
This post may contain affiliate links, which means I get a small percentage of the sale at no extra cost to you. I only recommend items I love and have had a positive experience with. Thank you!
Interested in the pole barn home construction process? I’ll take you through our journey of building a custom pole barn home by ourselves. Don’t miss it!

I’ve shared a lot of information about our pole barn home over the years. We built this beautiful home ourselves. Most of the labor and all of the general contractor duties were carried out by Mr. Tidbits himself (my husband Kevin). It was an incredible experience in many ways. I think of it as the type of experience I wouldn’t trade, but also wouldn’t want to repeat. Know what I mean?
I know we’re not the only people who have gone through this process. Building your own home is something that a lot of people consider doing or that they just find interesting. That’s why I shared our reasons for building a pole barn home and how much our pole barn house cost.
Even though I’ve covered several pole barn home topics, I still get lots of questions. Many of them are things like, “How did you build it yourself? What was the building process like? How do you even start something like that?”
Those are excellent questions! I hope to give you a step-by-step look at the pole barn construction process and what type of things to expect from this building project.
Disclaimer: This isn’t meant to be a one-stop guide to residential pole barn home construction. We aren’t professional home builders. Instead, think of this as a bird’s eye view meant to give you insight about what goes into building a pole barn home.
To watch my YouTube video about building this process, just click on the button below.
More ways to watch
Find this post on YouTube!
Table of contents
- Find this post on YouTube!
- What is a Pole Barn Home?
- What are the Advantages of a Pole Barn Home?
- Pole Barn Home Construction Process
- Planning Our Pole Barn Home
- Excavation and Foundation
- Prepping for a Radiant Heated Floor
- Pouring the Concrete Slab
- Framing the House
- Adding Trusses and a Roof
- Building a Pole Barn Home Porch
- Installing House Wrap
- HVAC System
- Running Electrical Wires
- Insulating our Pole Barn Home
- Sheet Rock
- Framing and Installing Exterior Doors
- Tin Roofing and Siding
- Finishing the First Interior Spaces
- Painting, Flooring and Kitchen Progress
- Moving in to Our Unfinished Pole Barn Home
- 4 More Years of Interior Finish Work
- Learn More About Our Pole Barn Home
What is a Pole Barn Home?
A pole barn home is a house that is built using post frame construction. You might also hear it called a post-frame home. Essentially, pole buildings are built using large poles that are placed along the exterior walls and set in concrete. The weight of the home rests on these poles rather than on the walls.
Pole barn homes and barndominiums are similar because they both use post frame construction. The major difference between the two is that pole barn homes use wooden post frames and barndominiums use steel frames.
You should checkout my latest blog post, Design Ideas for a Pole Barn House if you want to learn more about pole barn homes.
What are the Advantages of a Pole Barn Home?
Pole barn homes offer a great alternative to stick-built homes. The post frame construction uses less concrete than traditional homes, which can save a significant amount of money.
Post frame houses don’t have any load-bearing walls on the interior. That makes them the perfect blank slate for customizing a layout. You can create an open floor plan or throw up interior walls to your heart’s content. It’s a DIY design dream!
Pole Barn Home Construction Process
Here’s a look at the process to build our pole barn home. Of course I won’t be able to detail every single step. That would take far too long, but I tried to hit the highlights for you. You should also know that because we have a detached garage all of these steps were done on both buildings at the same time.
Keep in mind that this was a long process. It’s not for the faint of heart, but it is incredibly rewarding work!
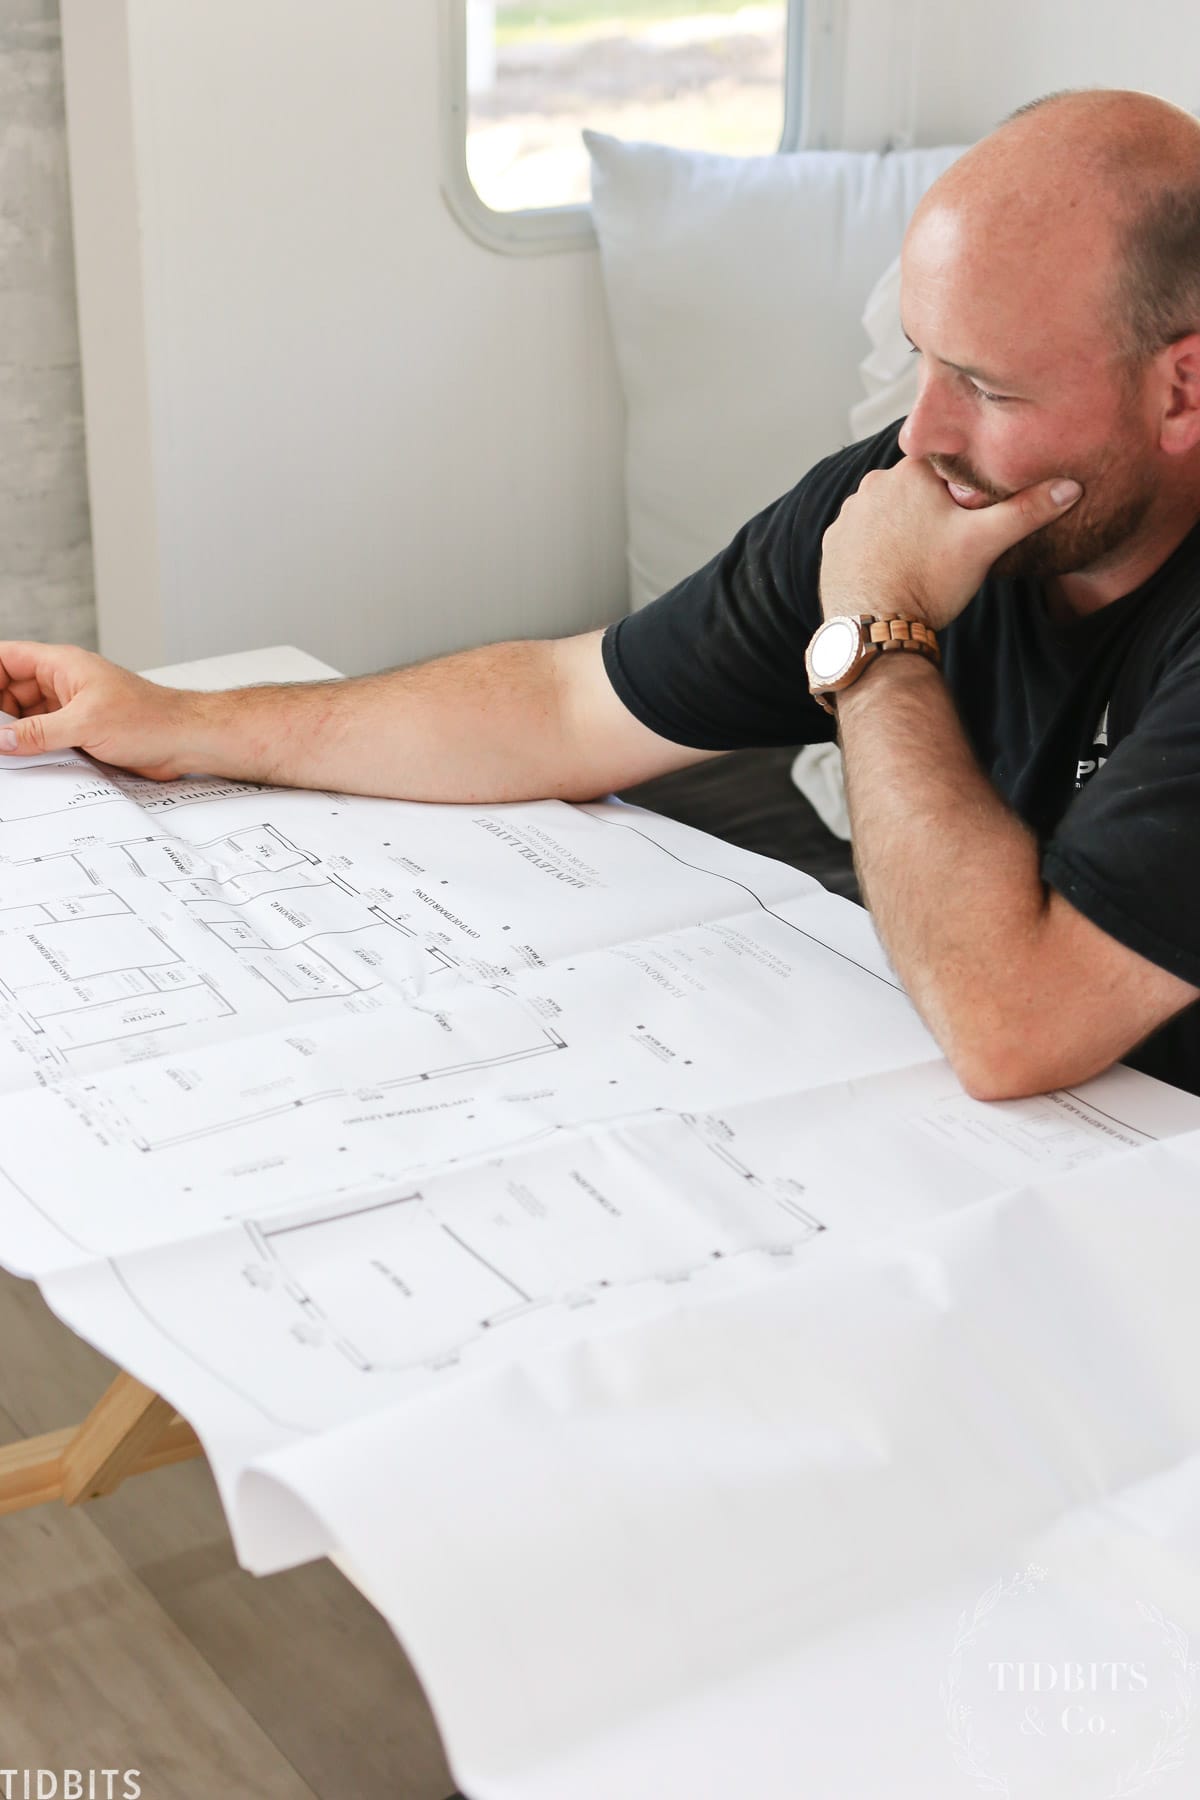
Planning Our Pole Barn Home
This whole thing started with a lot of planning. We knew we’d be building a pole barn home so we worked and reworked a floor plan that would fit into our home’s rectangle shape. Our aim was to maximize all our square footage and vertical space.
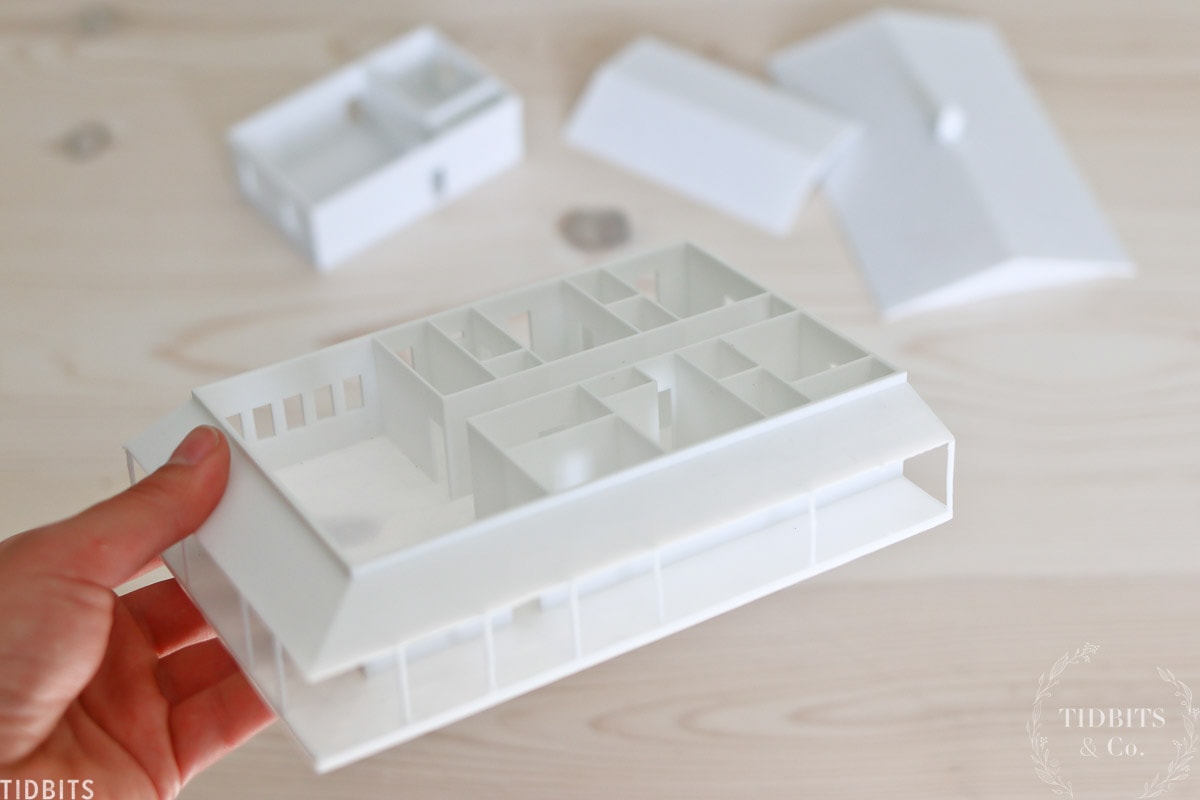
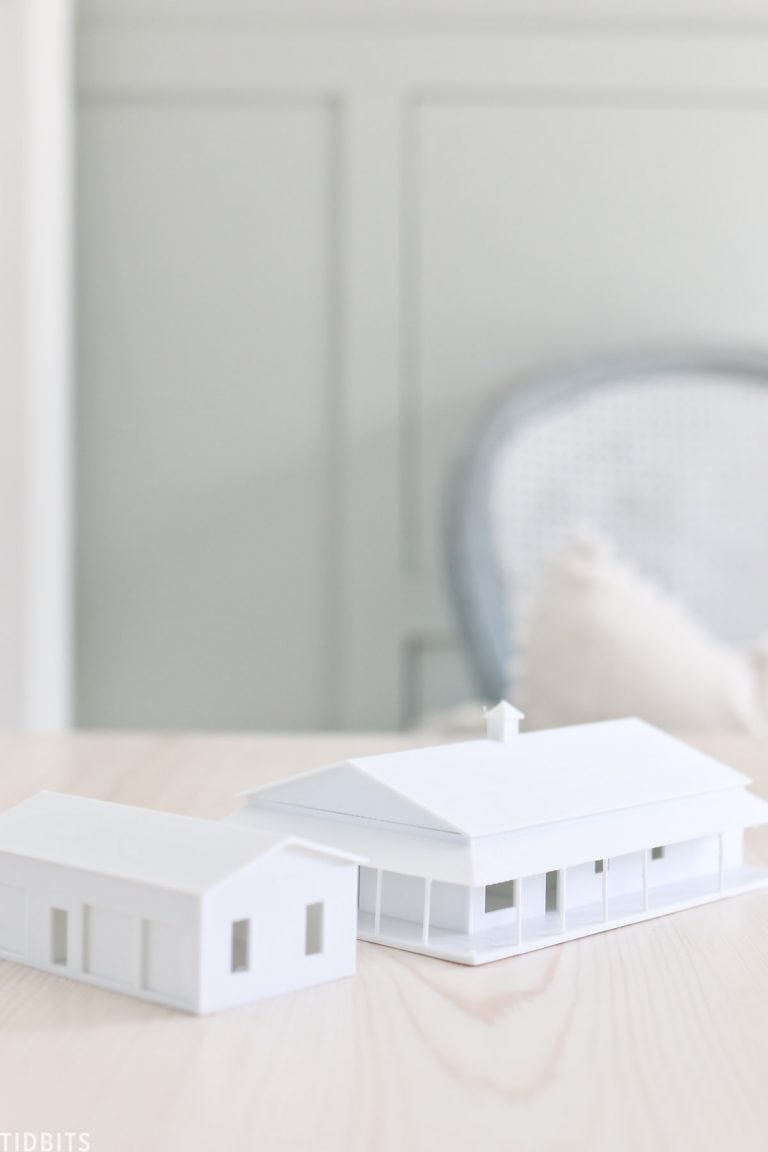
Once our floor planning was completed, Mr. Tidbits printed a 3D model of the home. That model was really helpful in letting us envision the scale and proportion of everything.
Next, we took our plans to an architect for drafting and engineering to ensure that we had all the information we needed to construct the home correctly.
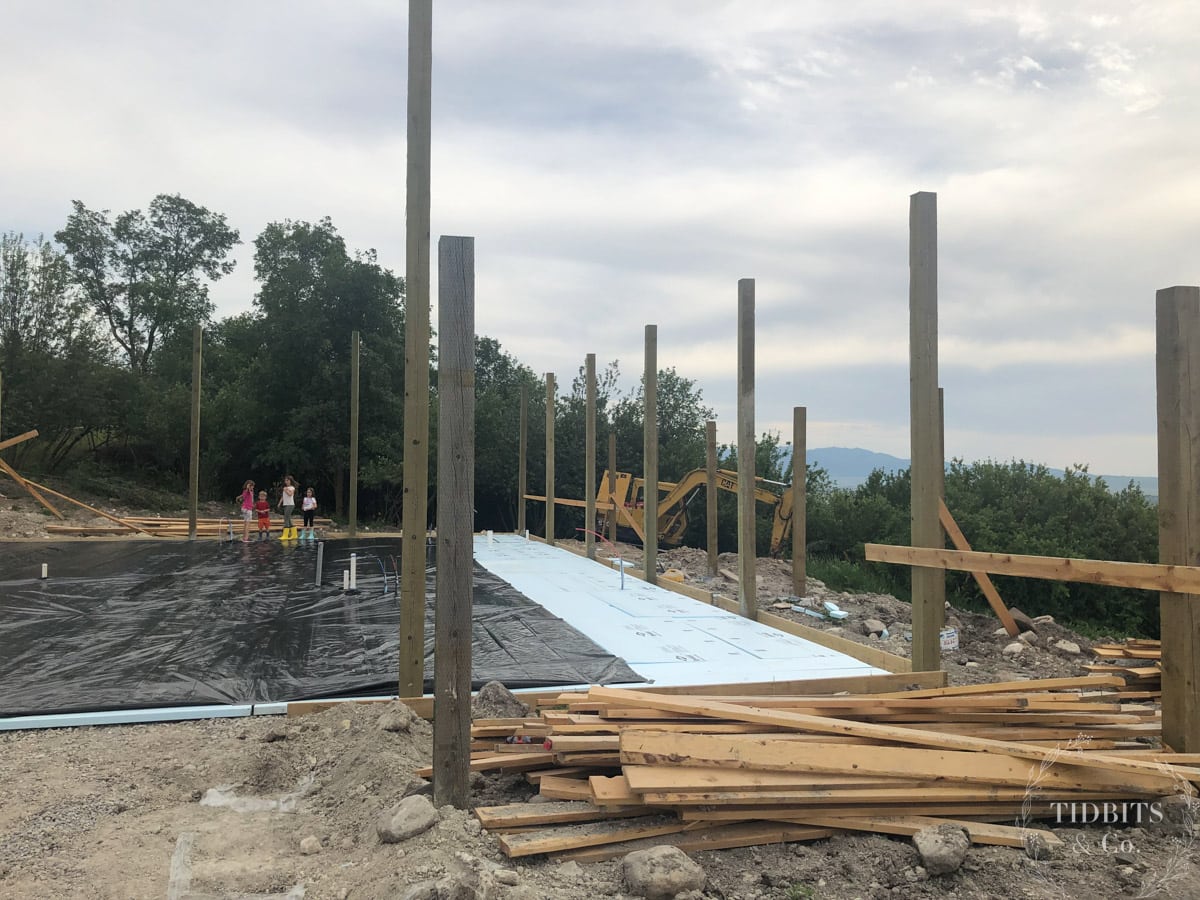
Excavation and Foundation
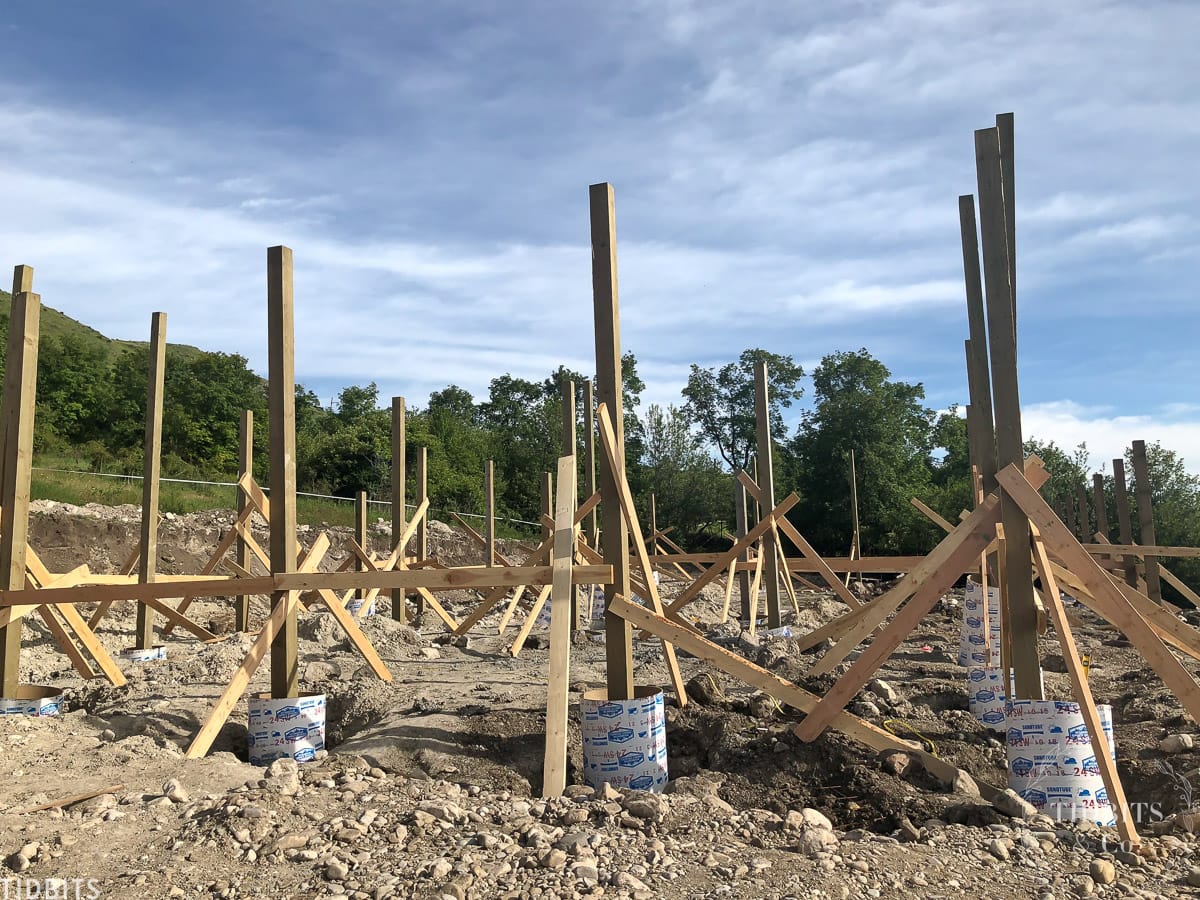
Excavation work was next. We flattened the ground and dug large holes that the post frames would sit in.
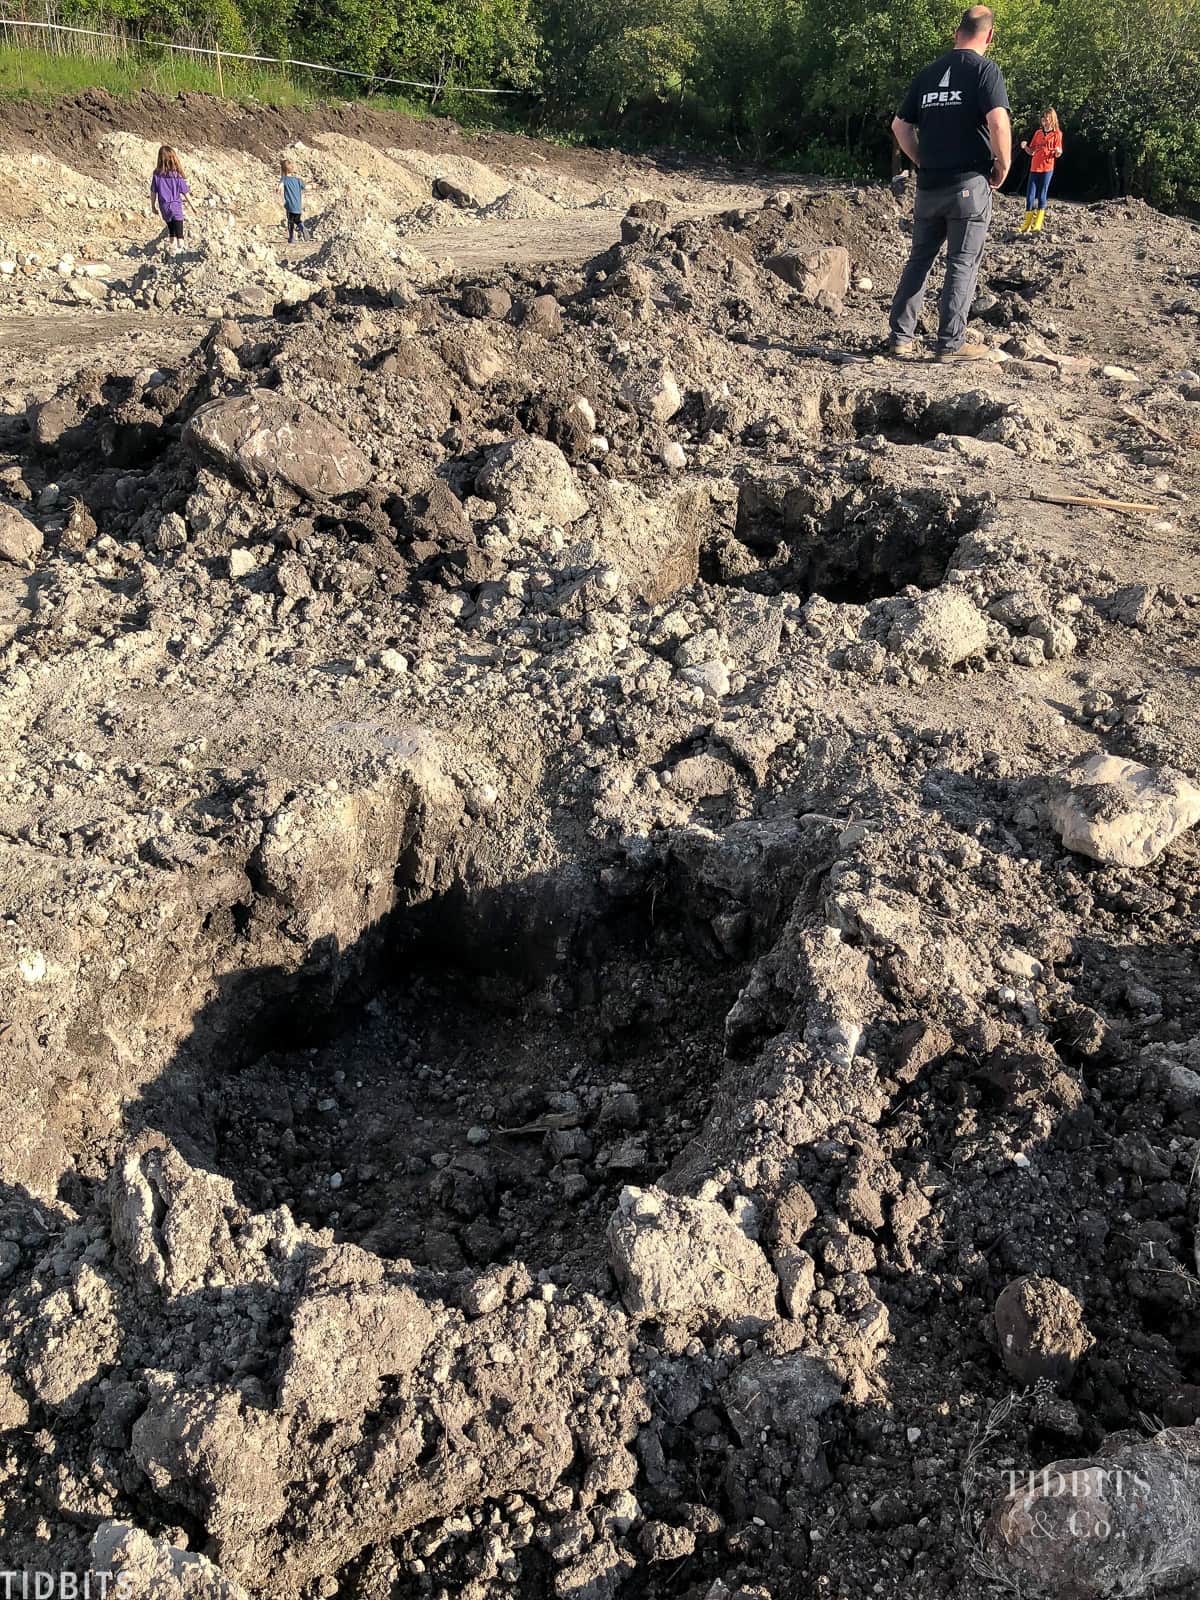
A square concrete pad was poured in the bottom of each hole to act as a footing for the post to sit on.
See the Sonotubes below? Those get filled with concrete to securely anchor the post beams and provide a foundation for the home.
We also excavated to run the home’s electric and plumbing lines. We don’t have a basement so all the utility lines run underneath the home’s concrete slab. Our engineered home plans were critical in helping us place all these features so that drains and water lines ended up exactly where they needed to be.

Prepping for a Radiant Heated Floor
We opted to do a radiant floor in our home to make it more energy-efficient. This required some additional prep work.
First, we laid foam sheets to act as an insulation barrier to direct the heat up into our home.
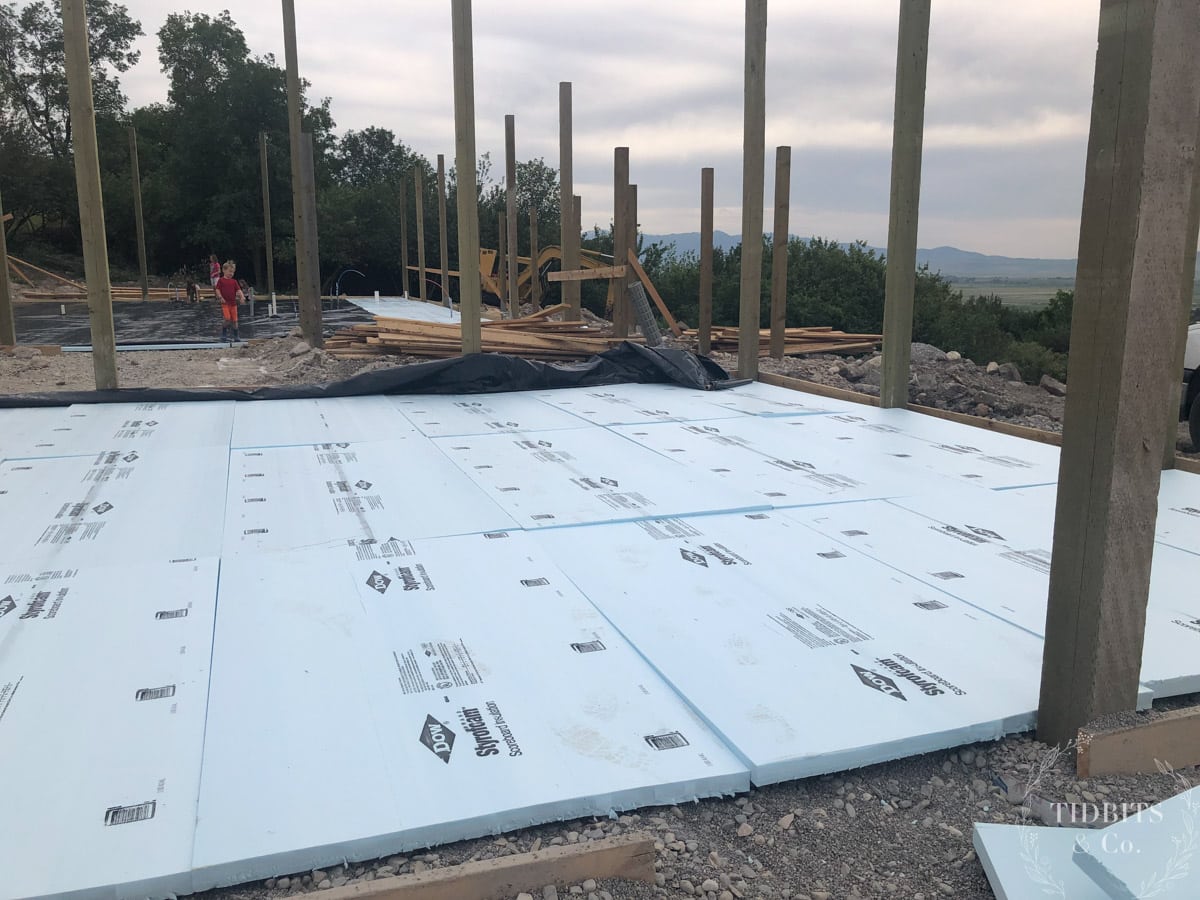
A plastic water barrier went on top of the foam to keep moisture from seeping up to the floor.
After the water barrier we ran lines of radiant heat tubing along the floor to provide even heat distribution. After that, the floor was ready for concrete.
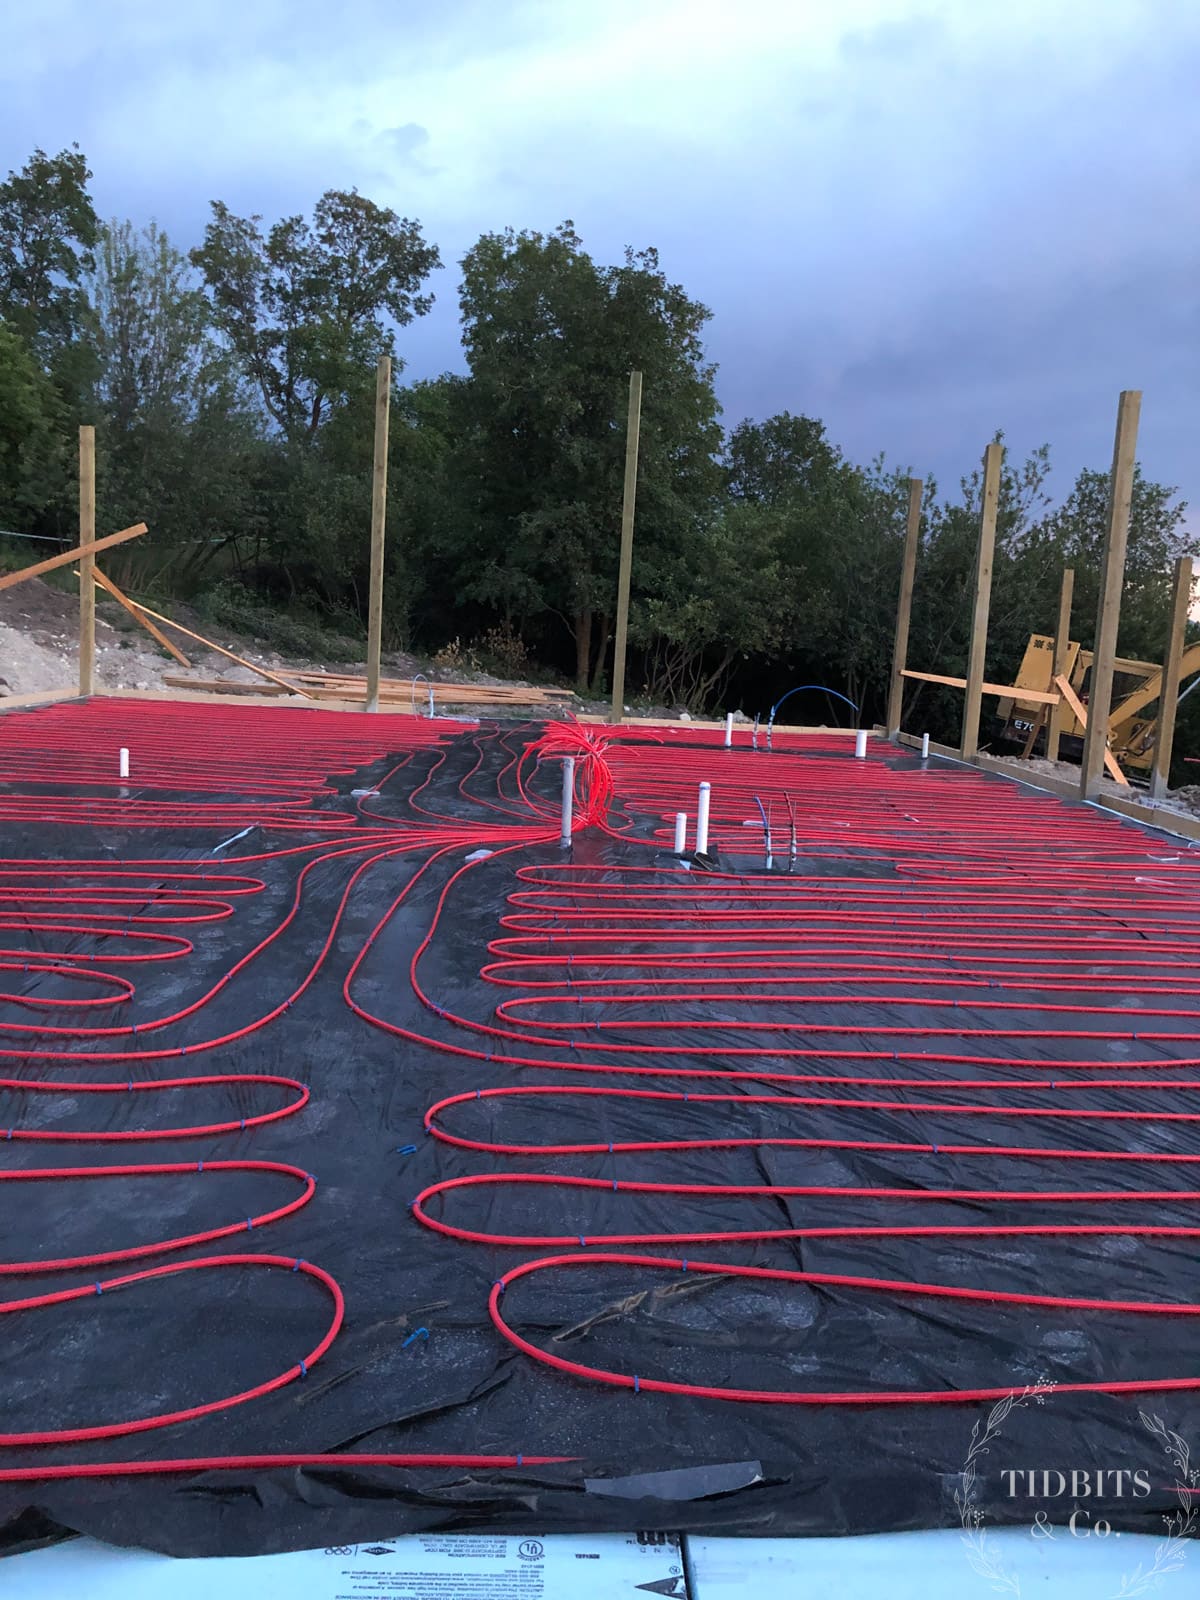
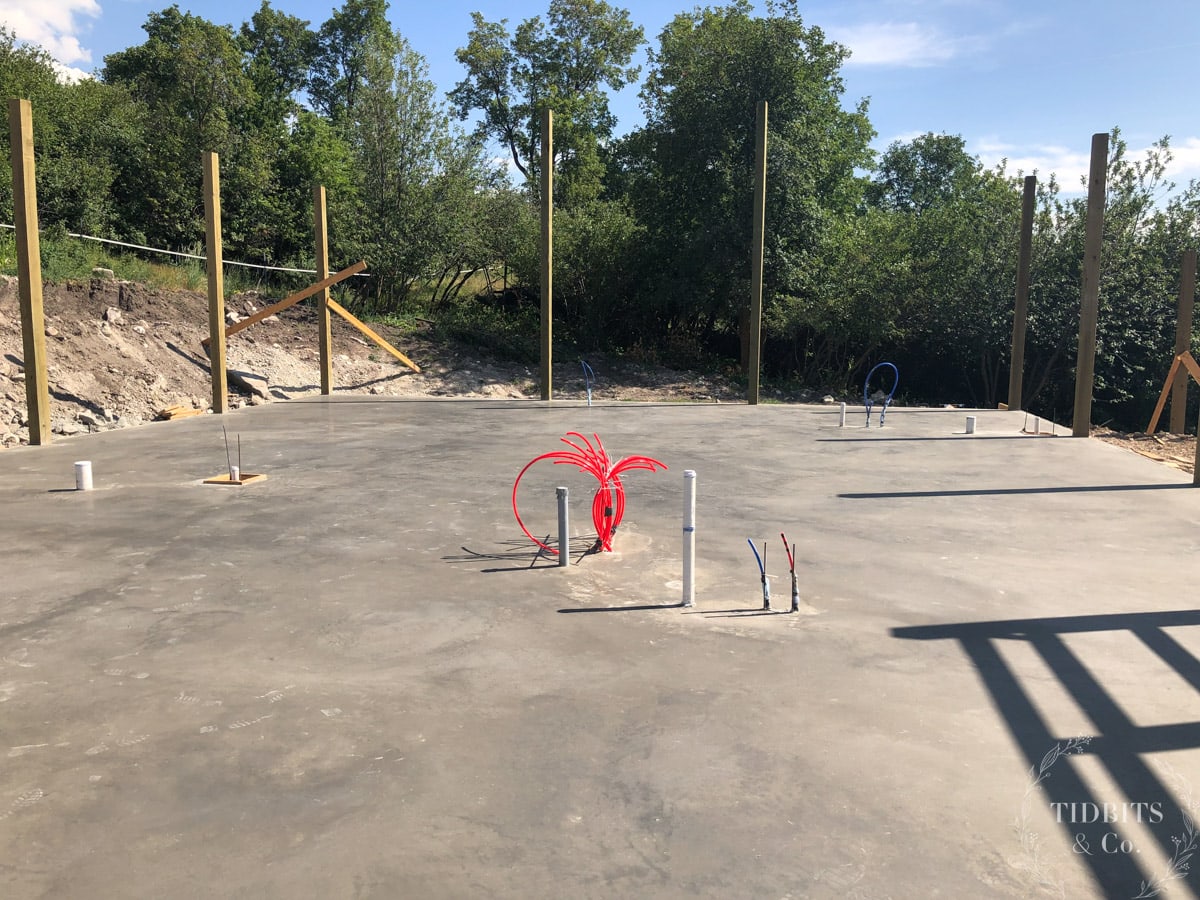
Pouring the Concrete Slab
With the floor prepped, it was time to pour the concrete slab which is the floor of the home. This is an exciting step in the construction progress!
Framing the House
Next up was framing the house. This is another exciting step when you get to see rooms taking shape.
Our home has 12 foot ceilings so these were some pretty tall walls to frame!
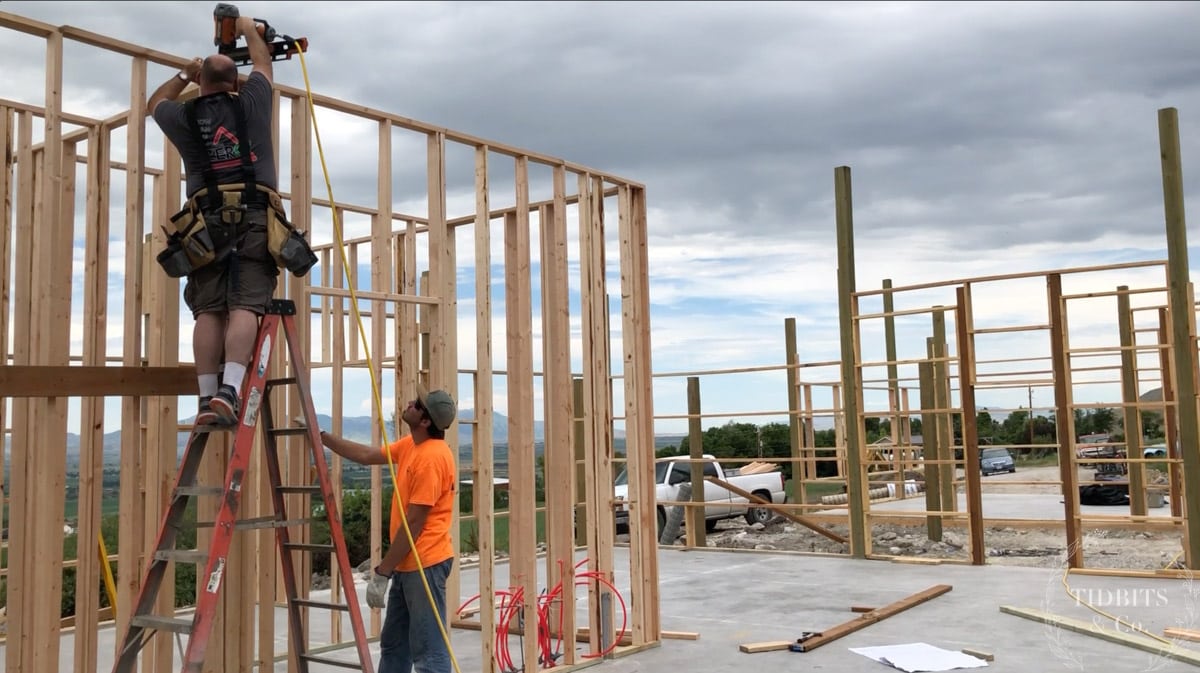
Like I mentioned earlier, post-frame buildings don’t have interior load bearing walls. Because of this they don’t require headers around windows or interior doors, which is why you won’t see any in these pictures.
Adding Trusses and a Roof
Adding the roof trusses was our next step. Our trusses rest on the main poles that support the house. We also have 2×6’s that run horizontally from truss to truss to support the weight of the roof.
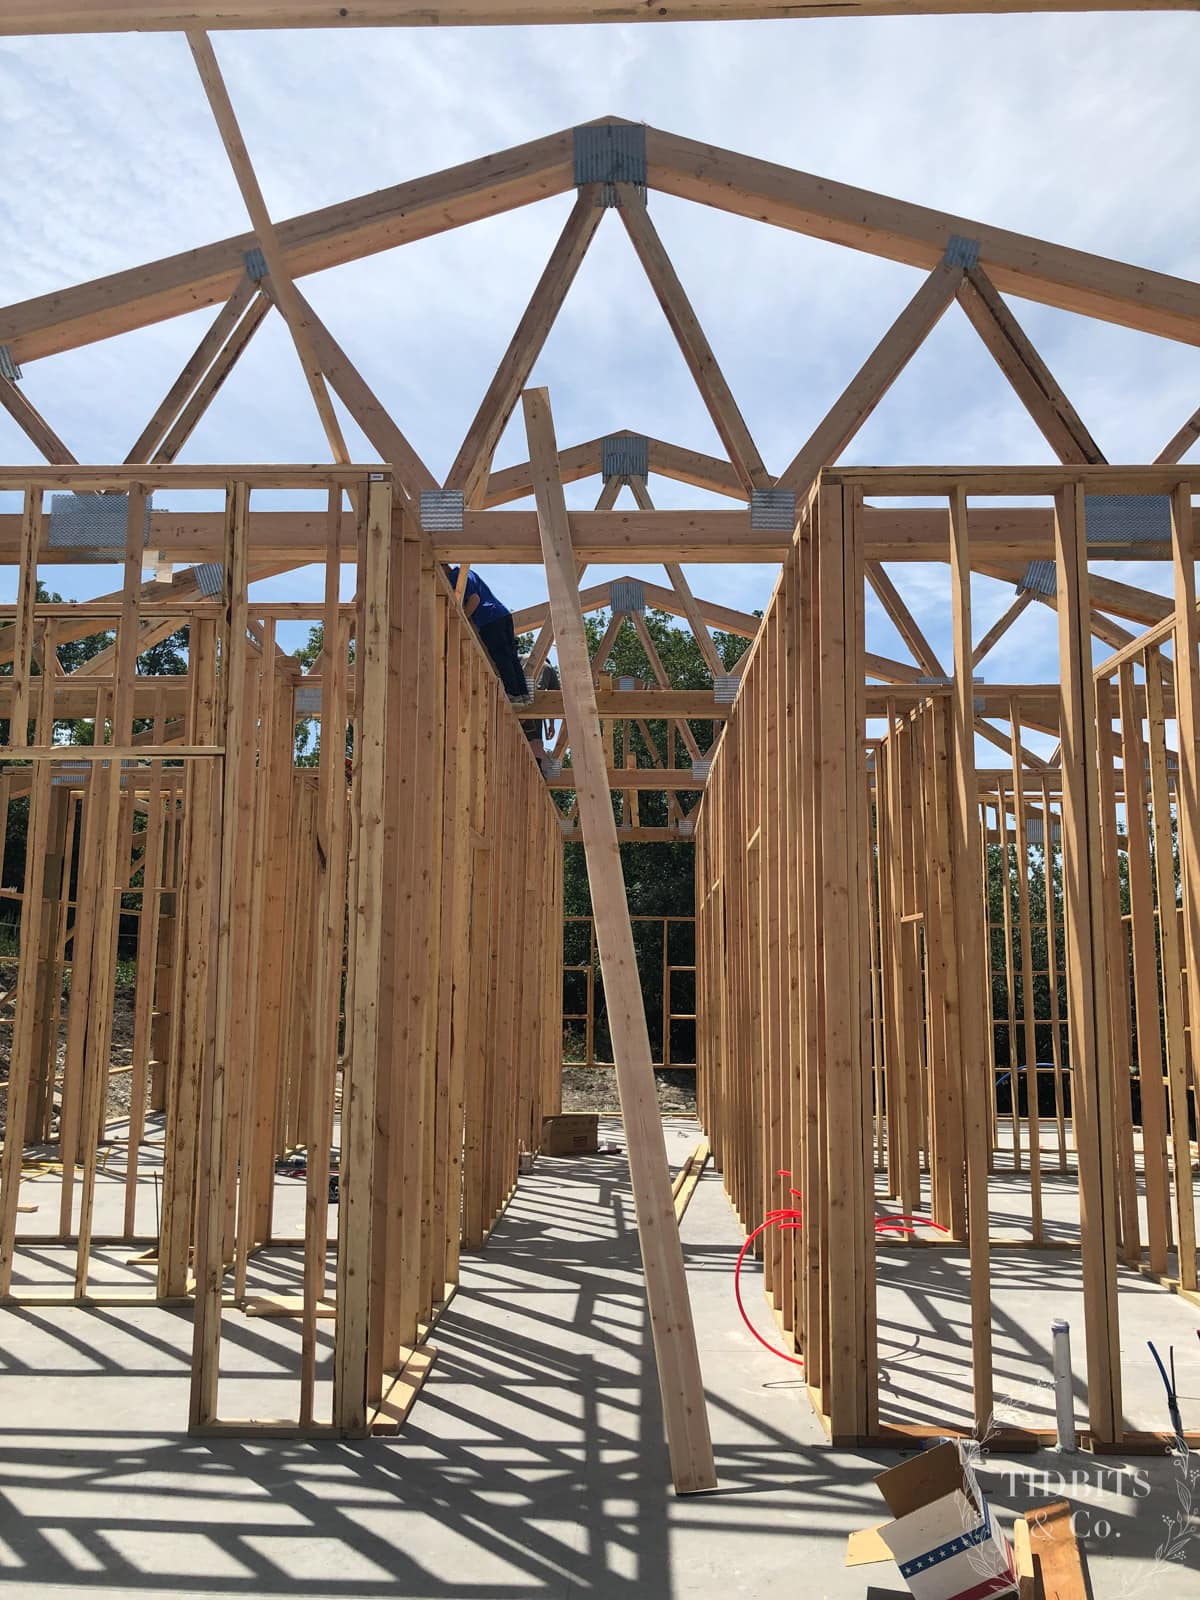
OSB or plywood sheets cover the roof. We also trimmed out the eaves in preparation for roofing.
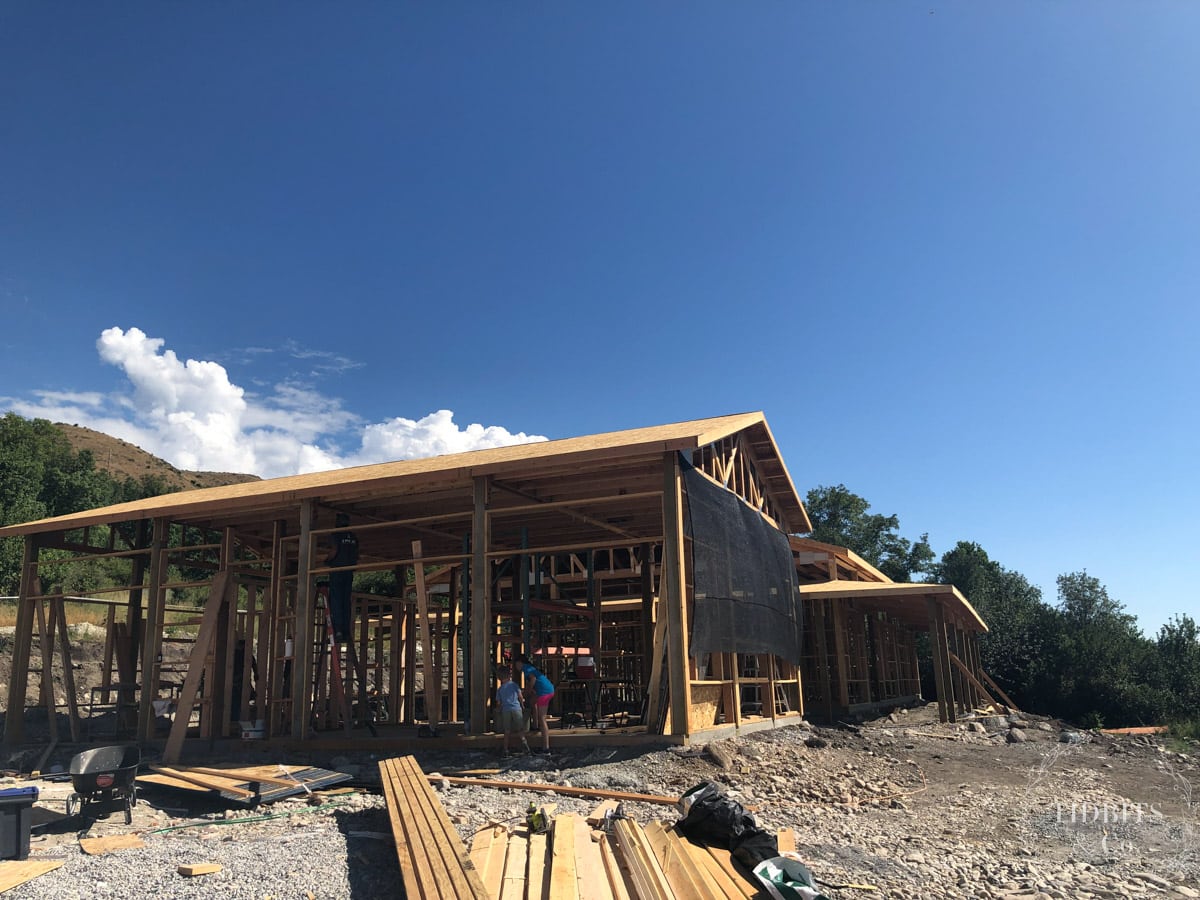
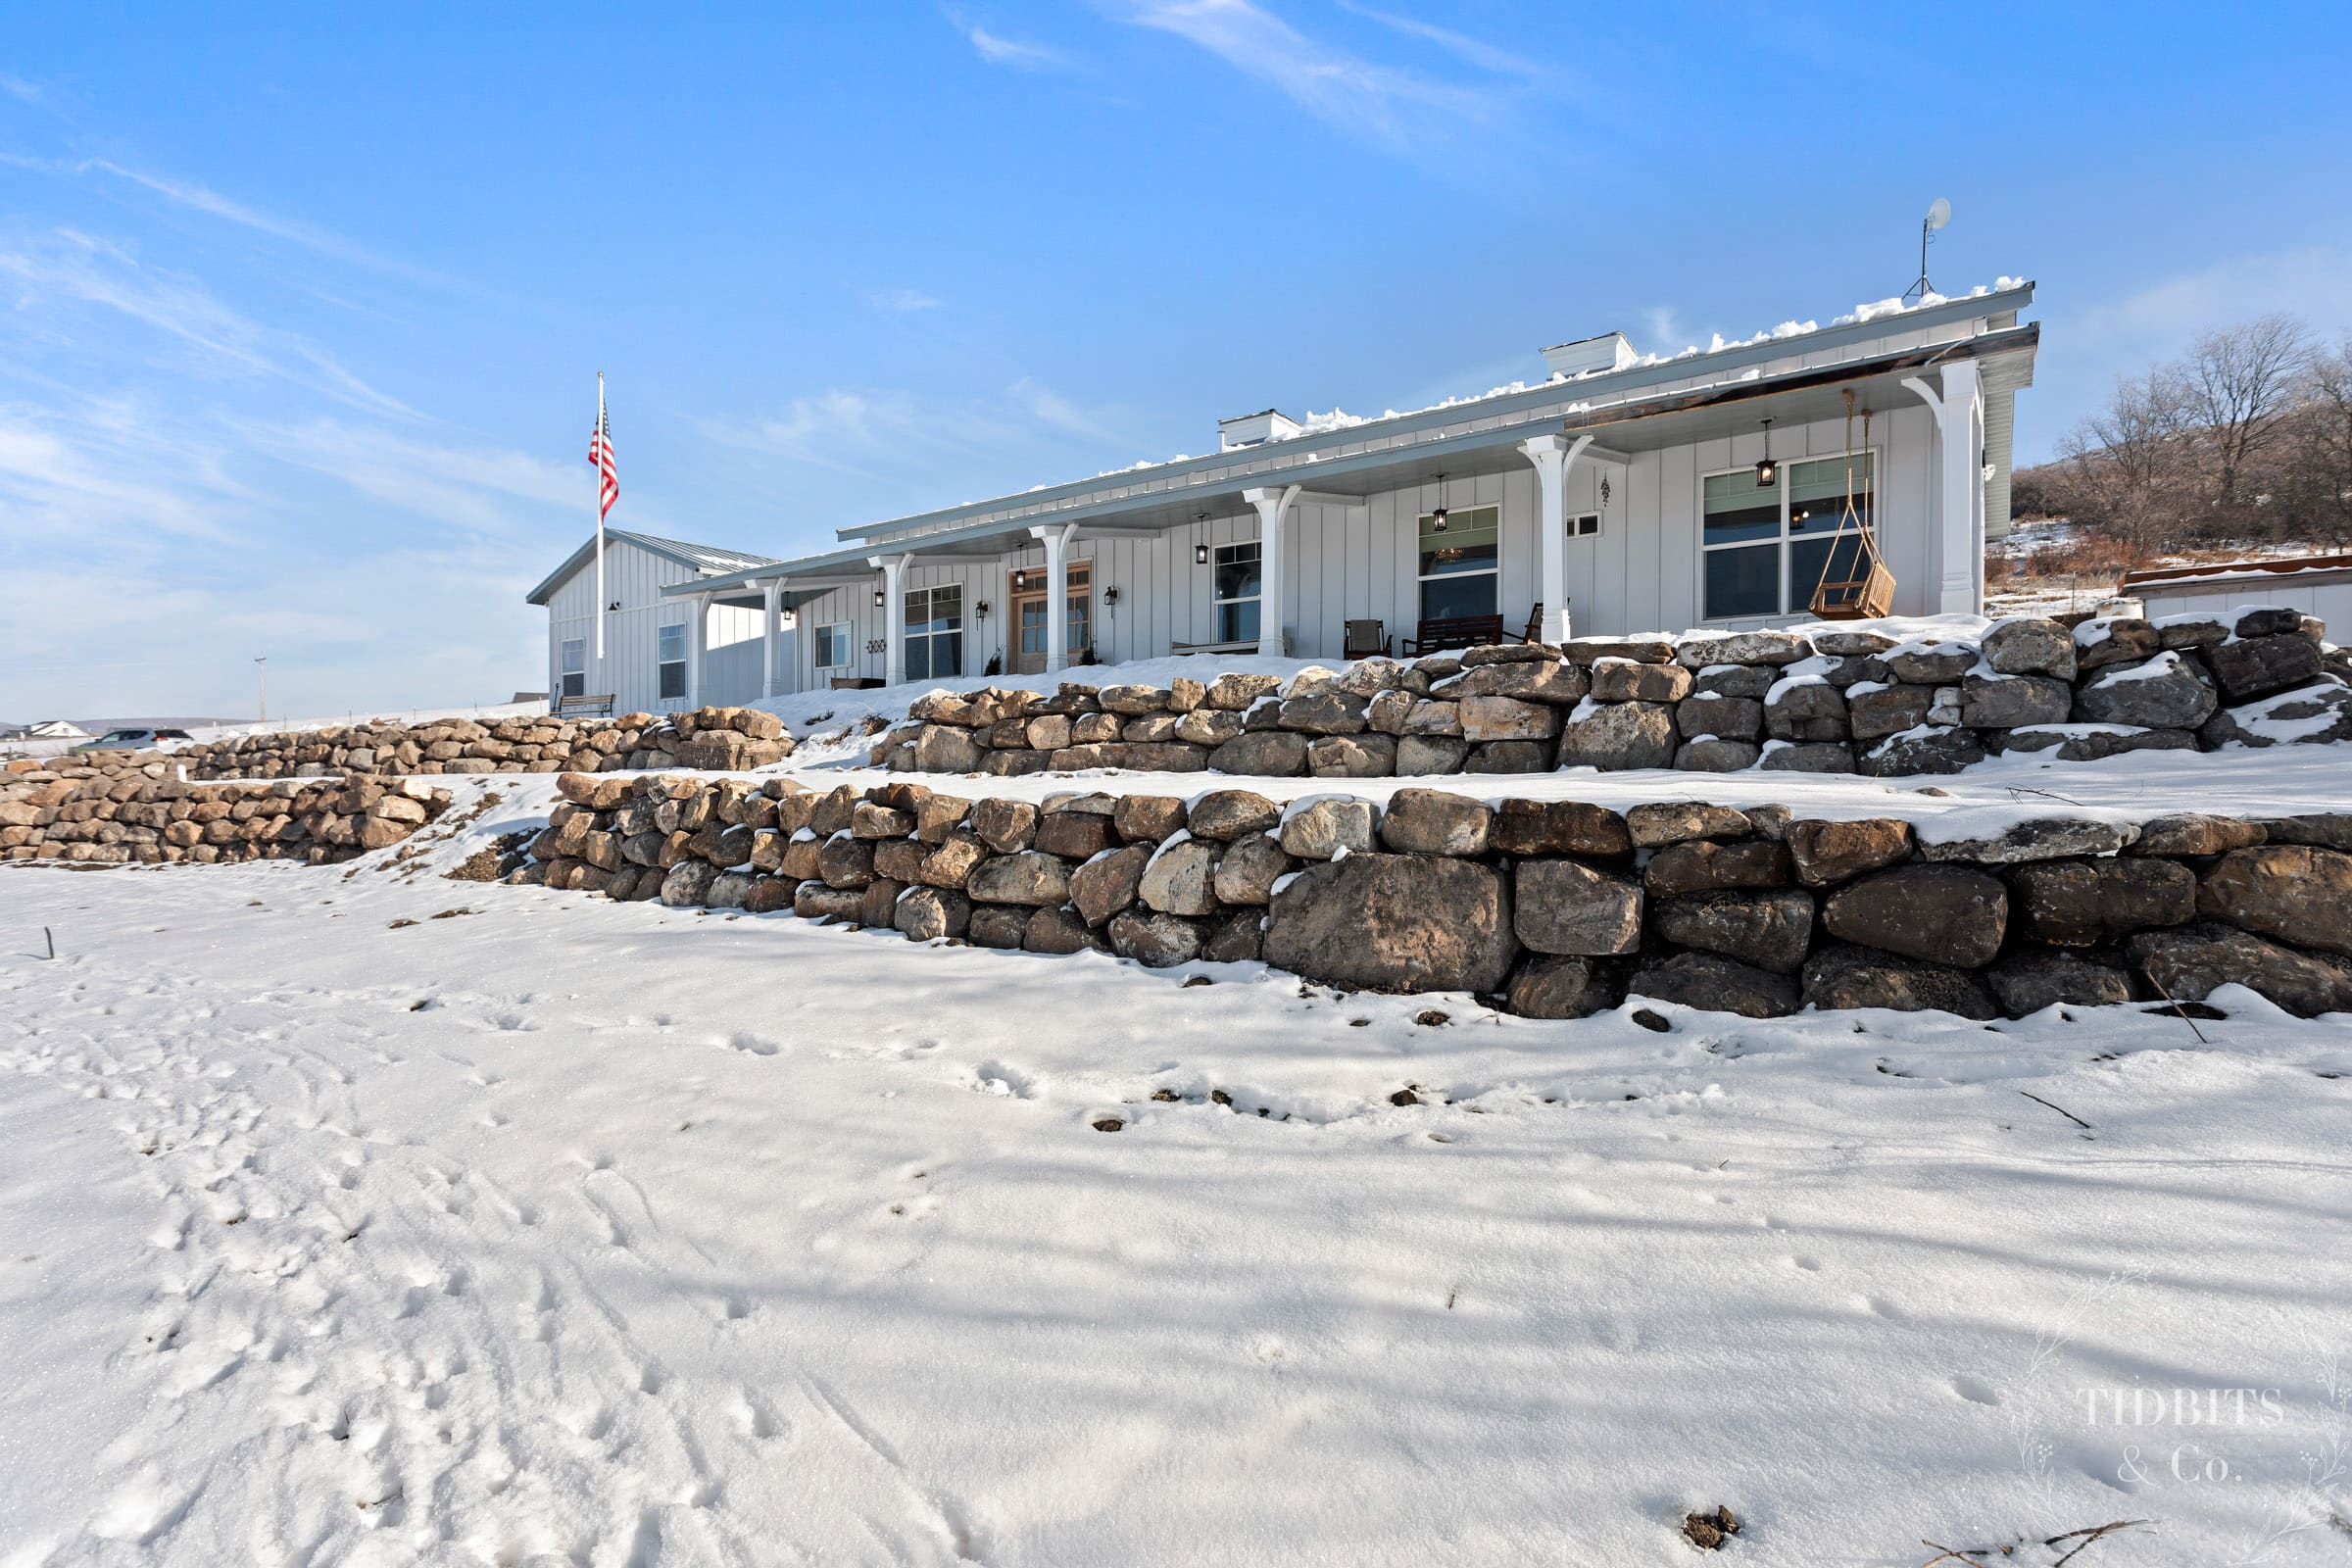
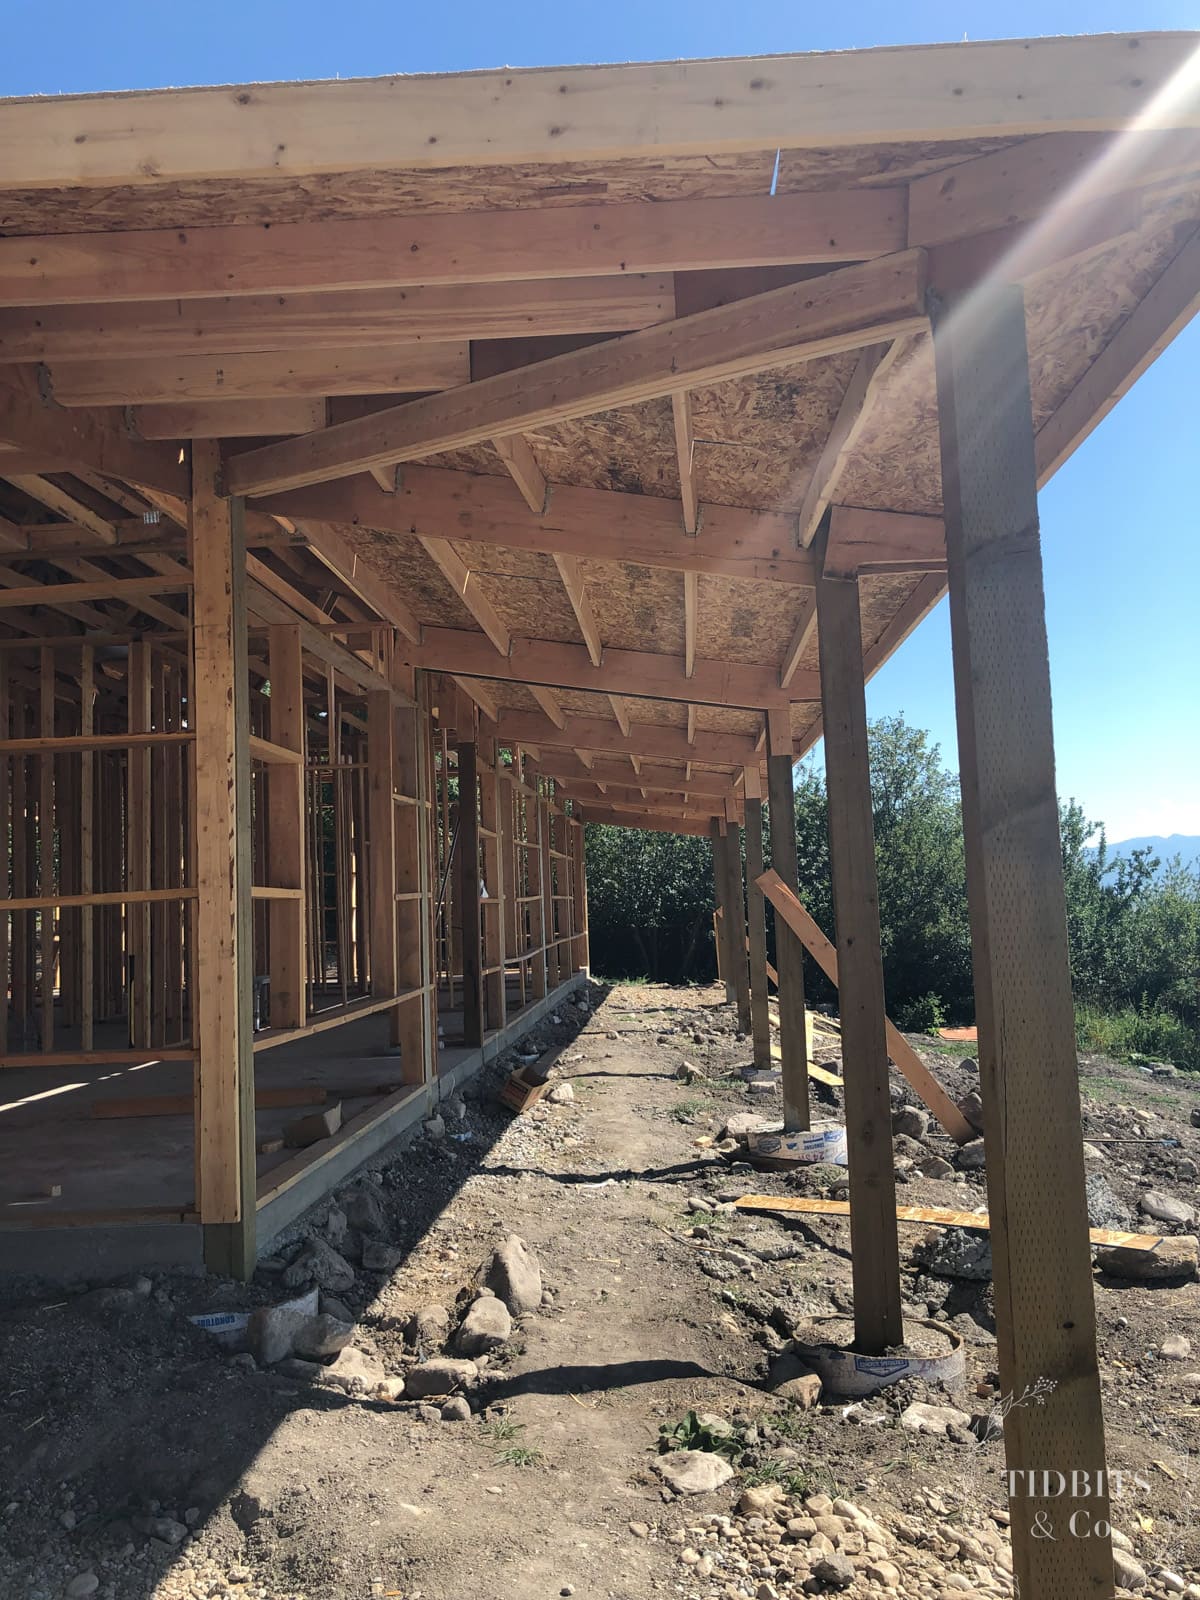
Building a Pole Barn Home Porch
We chose to do a full length porch along the side of our house. The porch has it’s own roof line to add dimension to the exterior. I sure do love that porch!
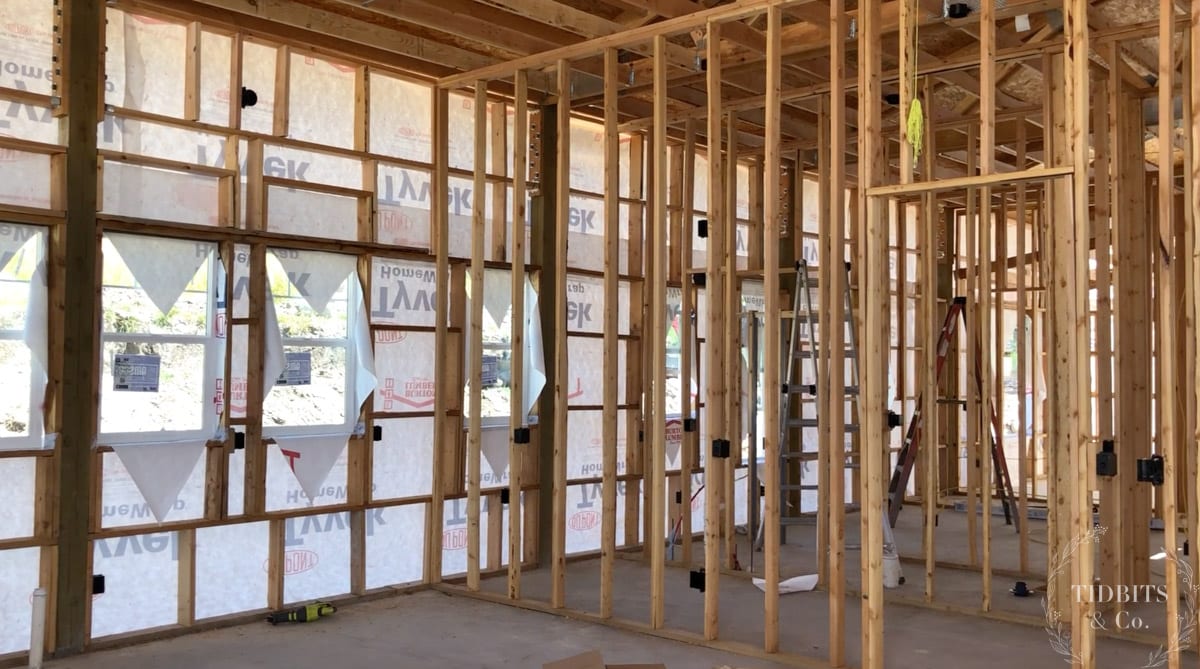
Installing House Wrap
The framing of the house was wrapped with Tyvek house wrap to act as a moisture barrier.
HVAC System
Our HVAC system, including the furnace, was installed in our ceiling. We did this to save space in our floor plan.
Changing the furnace filters up there isn’t the easiest thing, but it’s nice and quiet!
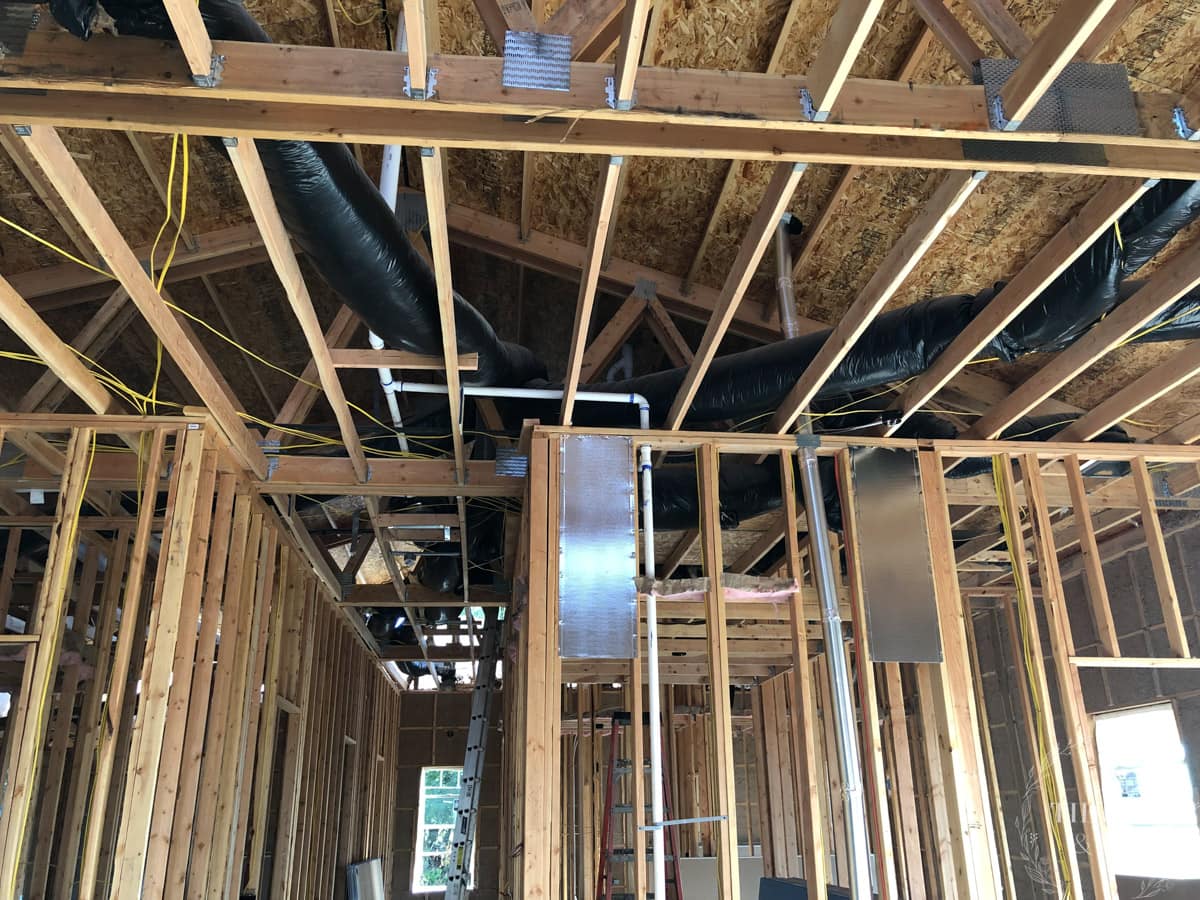
Running Electrical Wires
Wiring the house for electricity was another major step forward in the construction process.

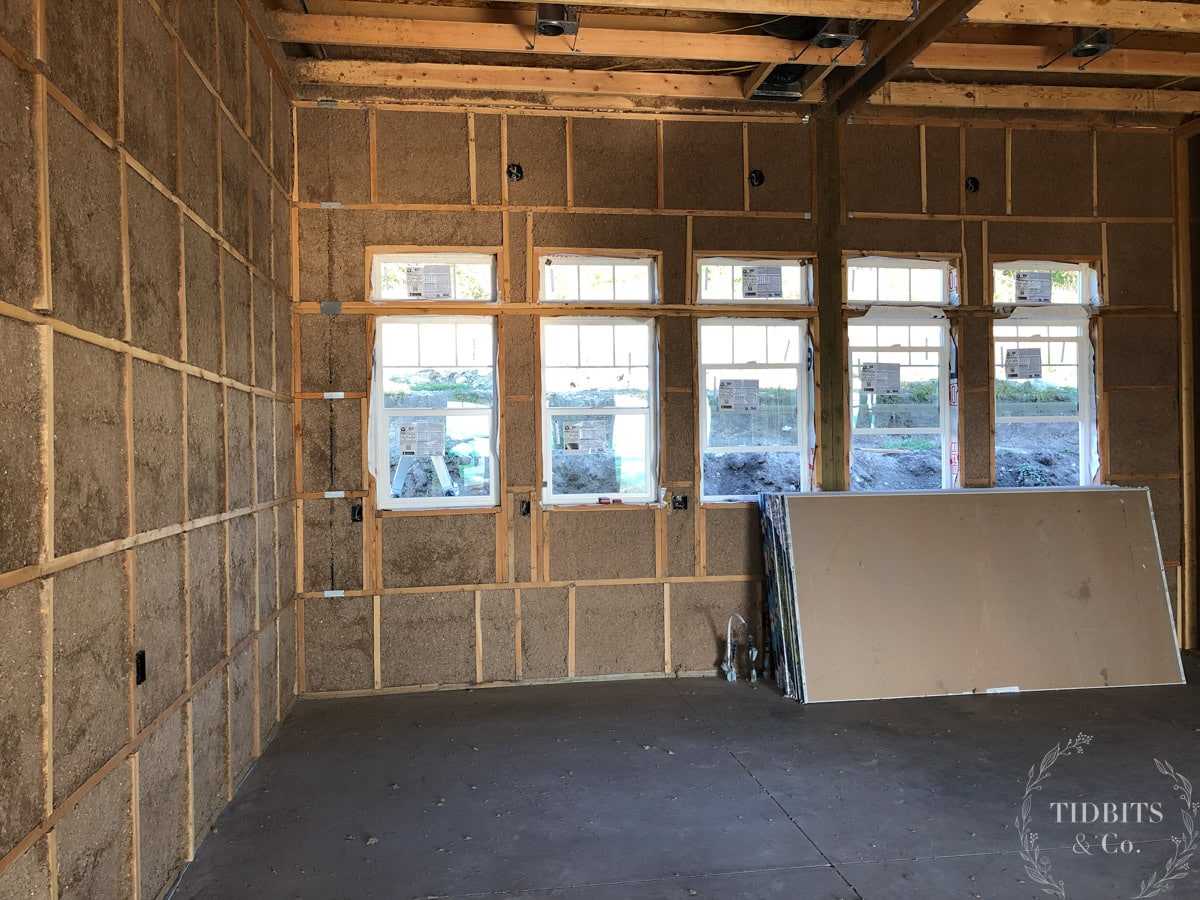
Insulating our Pole Barn Home
For the walls of our house we did a cellulose insulation.
The ceiling has spray foam insulation that was applied to the ceiling of the attic which allows us to get around in the attic area and access everything that we need to.
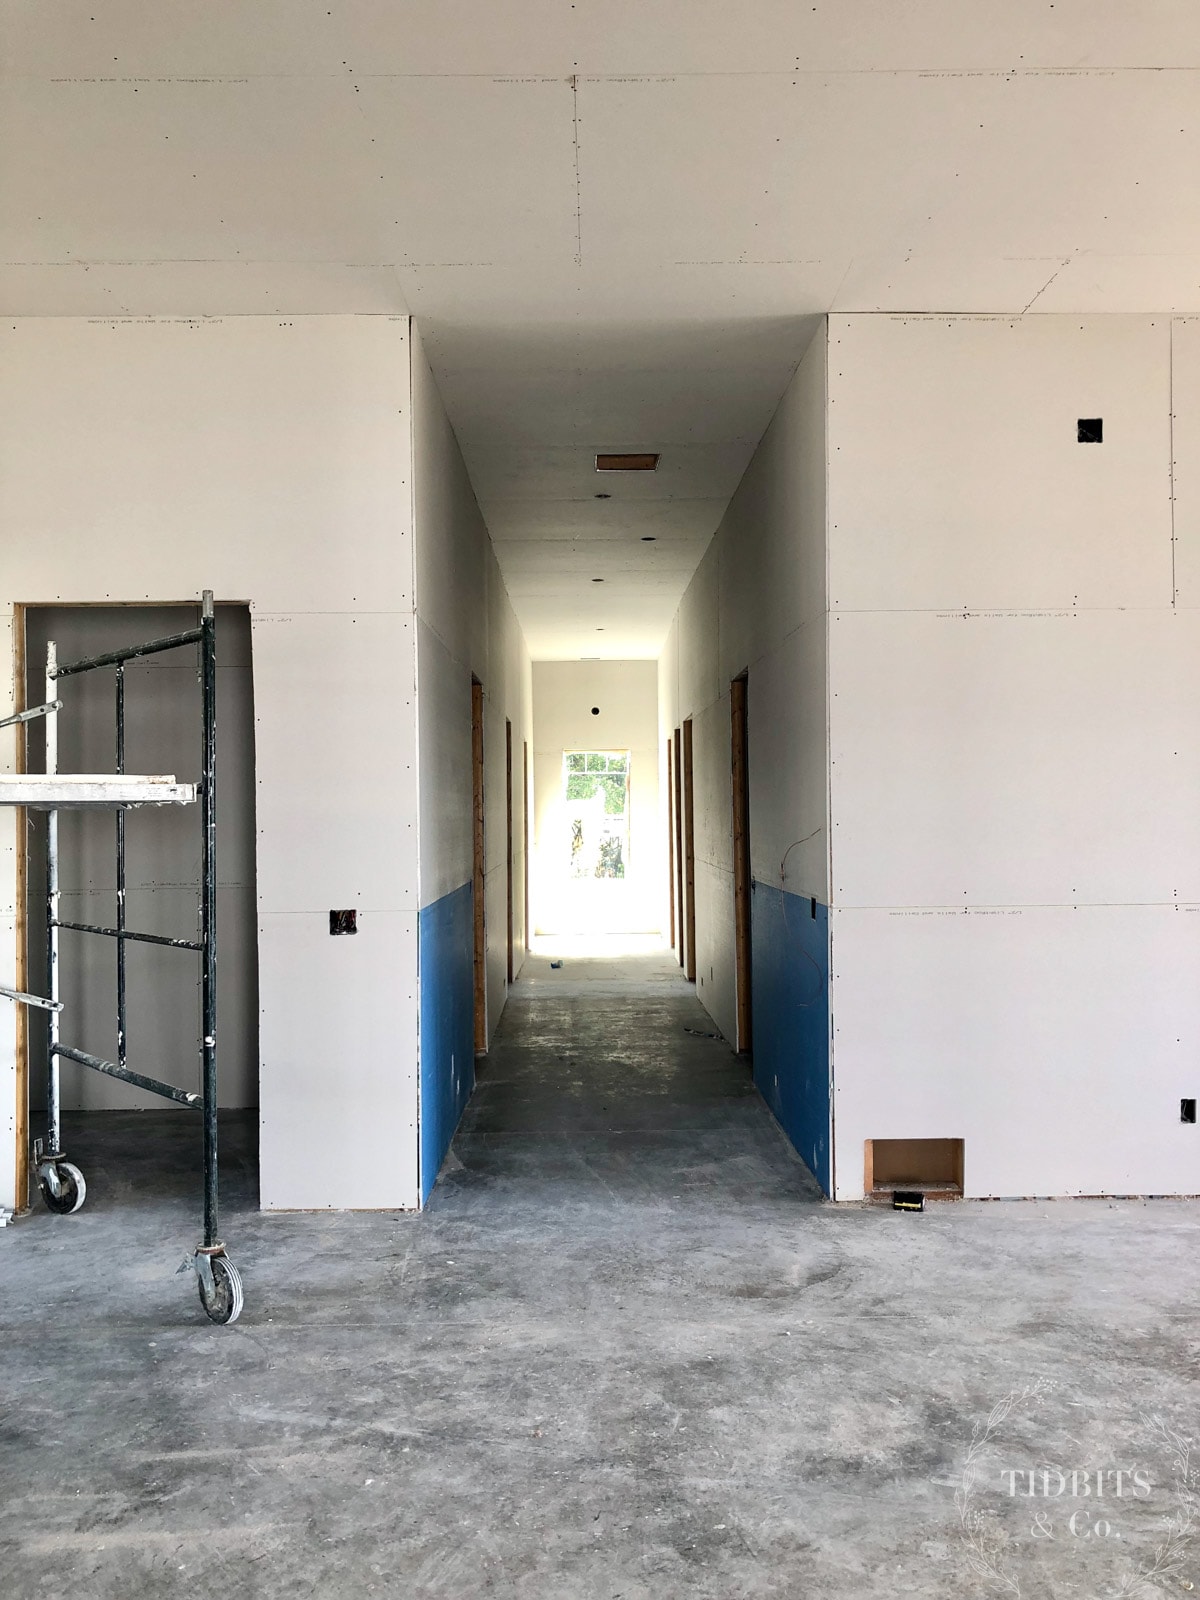
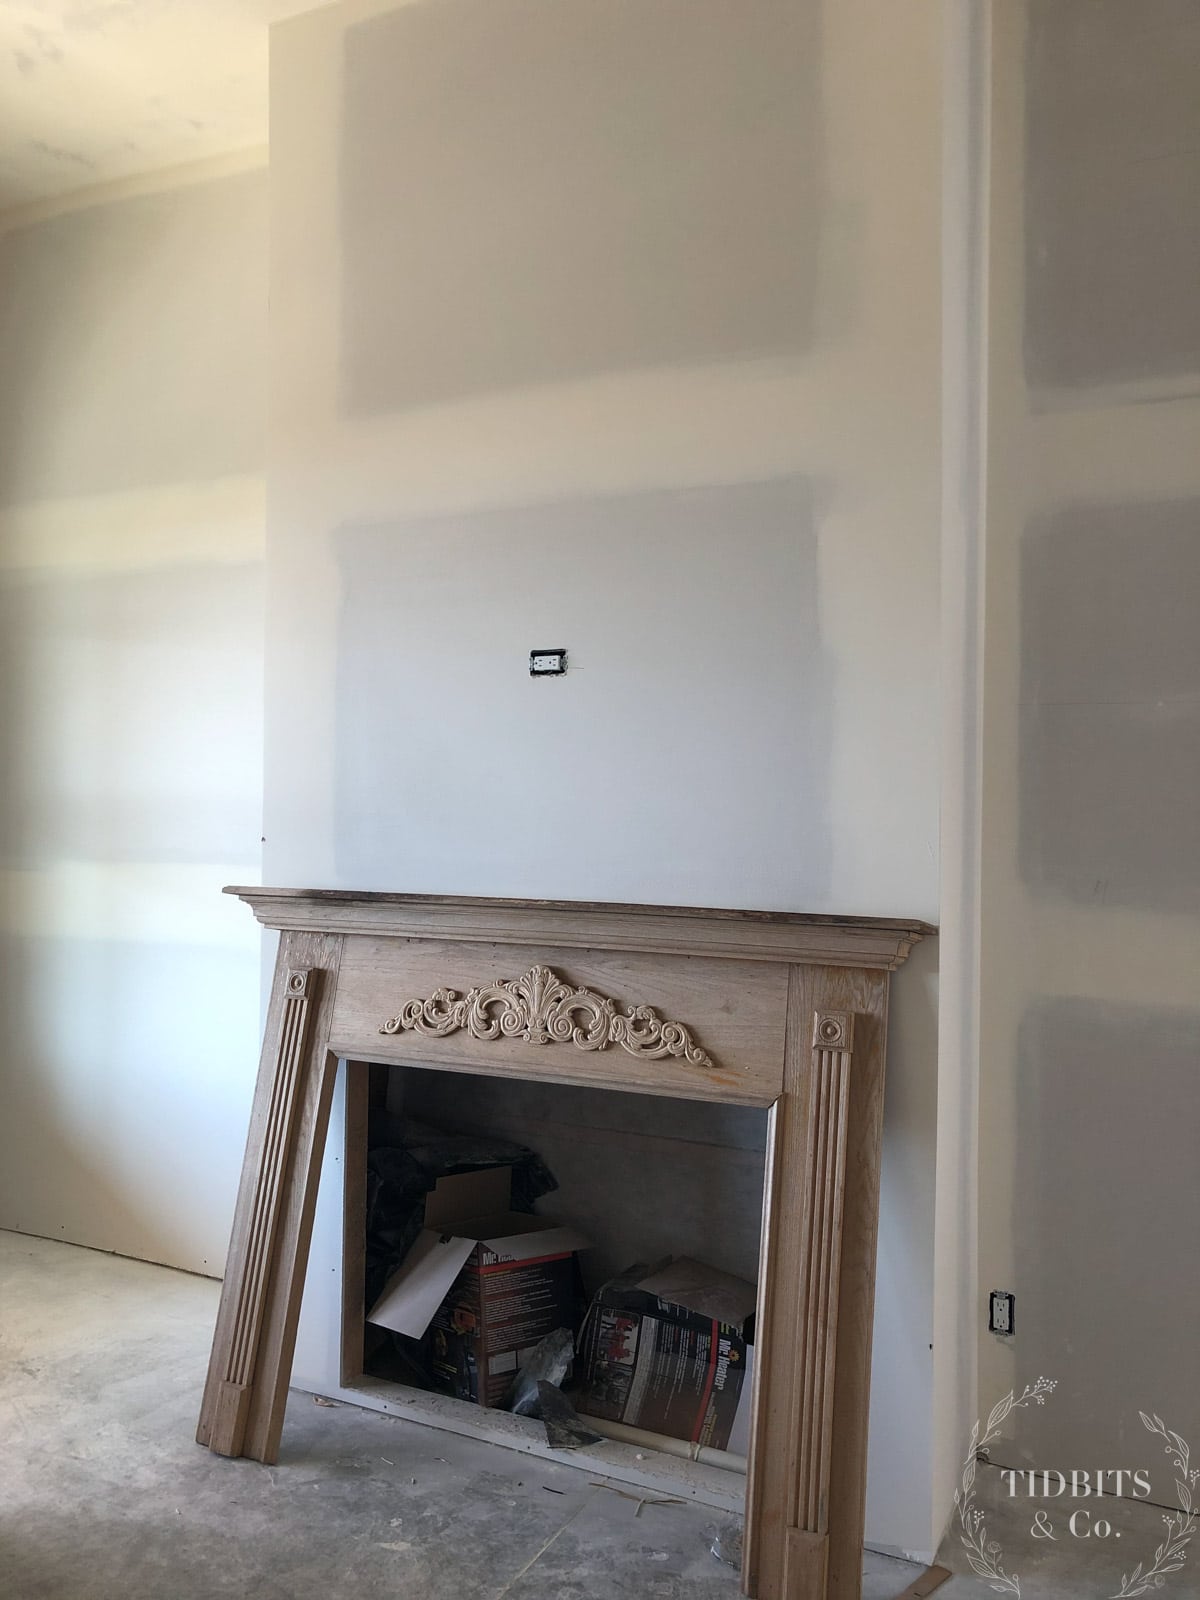
Sheet Rock
You can generally save a lot of money on labor costs by doing construction work yourself, but in our experience, dry wall or sheet rock has been an exception. We’ve found hiring that job out to be less expensive and to save tons of time. It’s definitely worth getting a quote to see if the same thing is true in your area.
Framing and Installing Exterior Doors
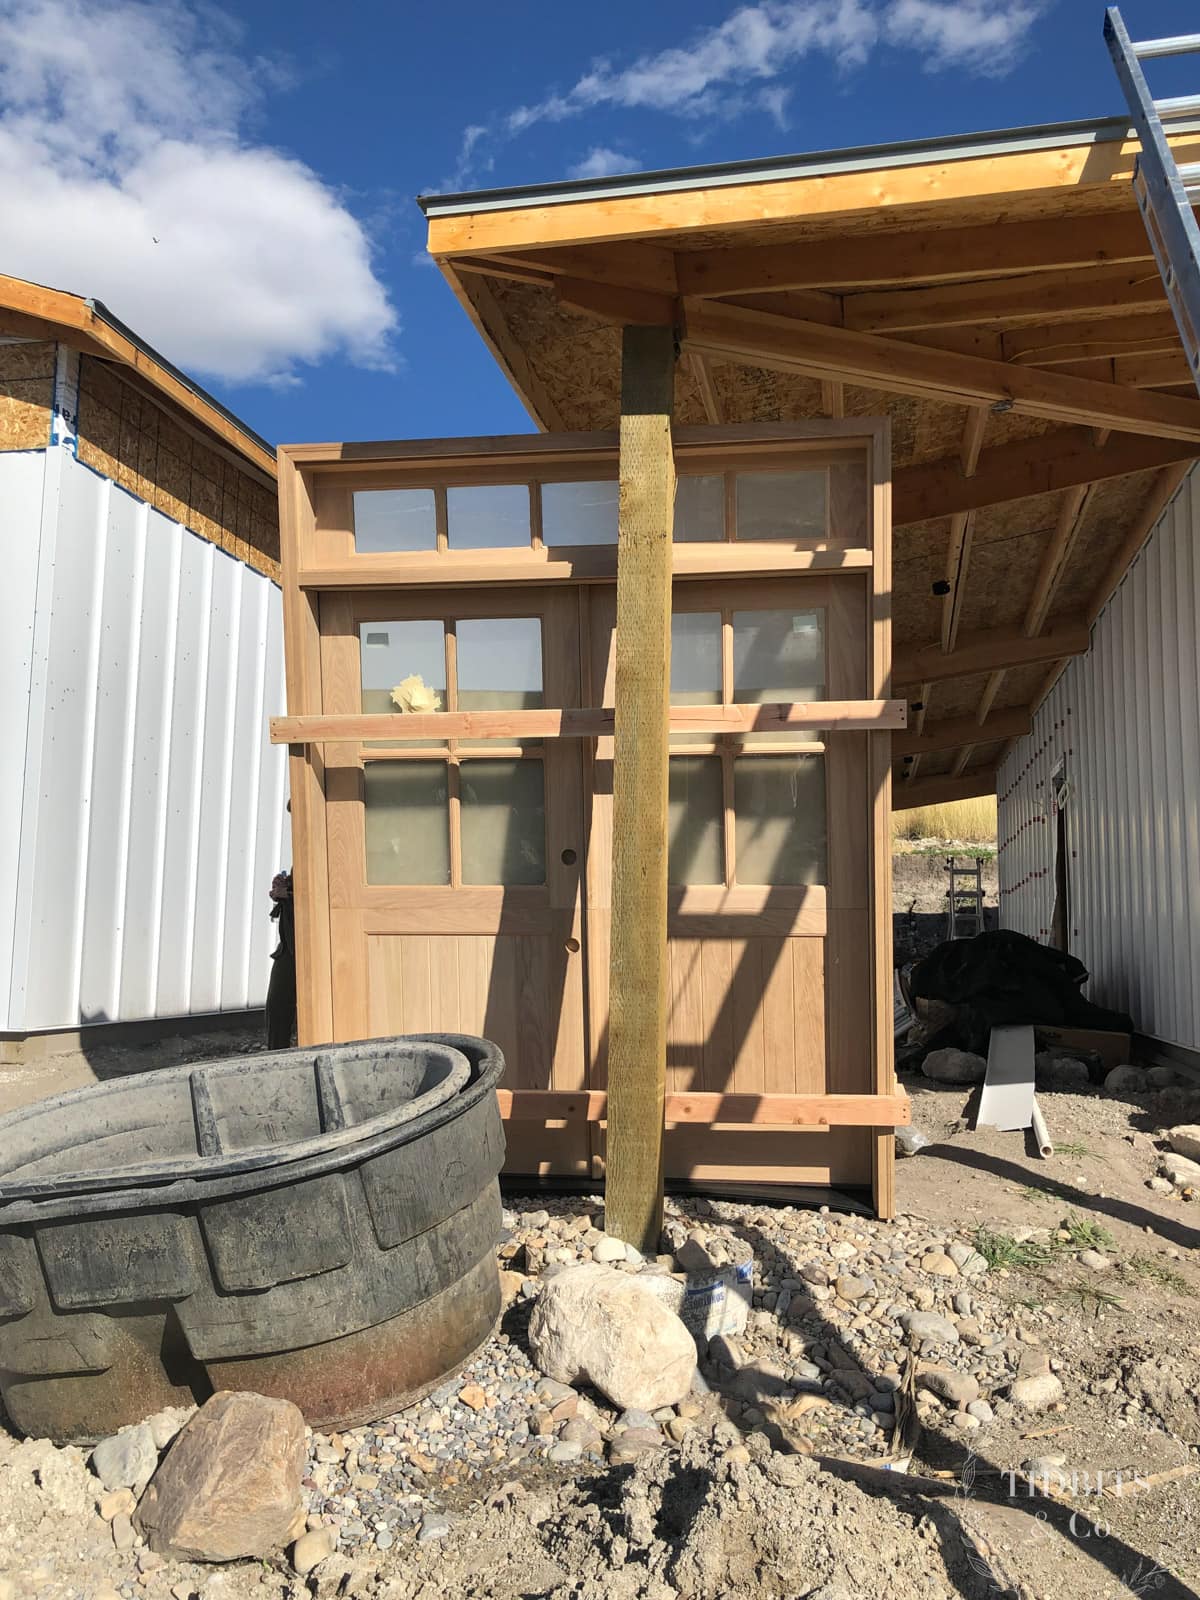
I fell in love with this white oak double dutch door. It took a while to receive the door since it was a custom order, but I’m happy we waited for it!
All of the doors in our house took a while to arrive and be installed. We chose to use very tall doors to match our tall ceilings. That meant saving up money and waiting on supply delays, but that’s all part of the process.
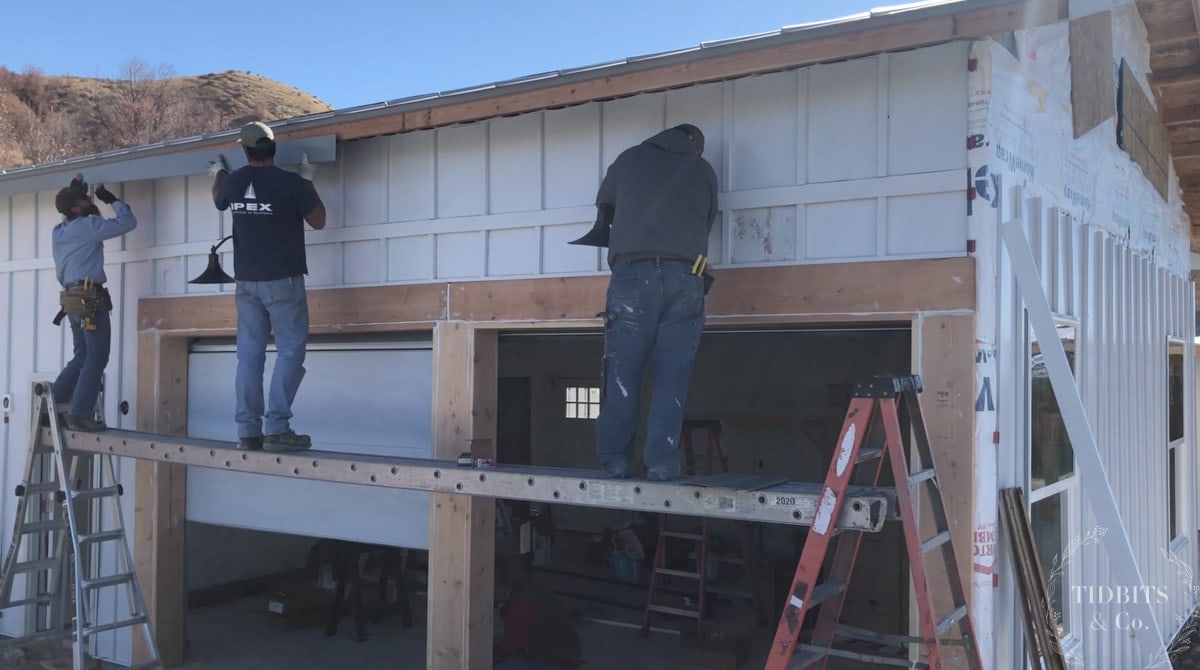
Tin Roofing and Siding
We wanted to use tin roofing and siding for it’s durability. The board and batten pattern of the siding helped create the “homie” look that we were going for.
If you’ve never considered tin siding, this is your sign to check it out! We love ours and it should last forever without any problems. We got our siding from a company called Teton Steel.
Finishing the First Interior Spaces
Mr. Tidbits finished all the interior work on the laundry room before we got to any other areas. That’s probably not the space we would normally choose to finish first, but we had a sponsored project with a deadline. You gotta do what you gotta do!

Above you can see the built in for the washer and dryer as well as cubbies for extra laundry room storage. What you can’t see is the generator and lights that are lighting up this room since we had to finish it before the electrical work was all done. Good times!
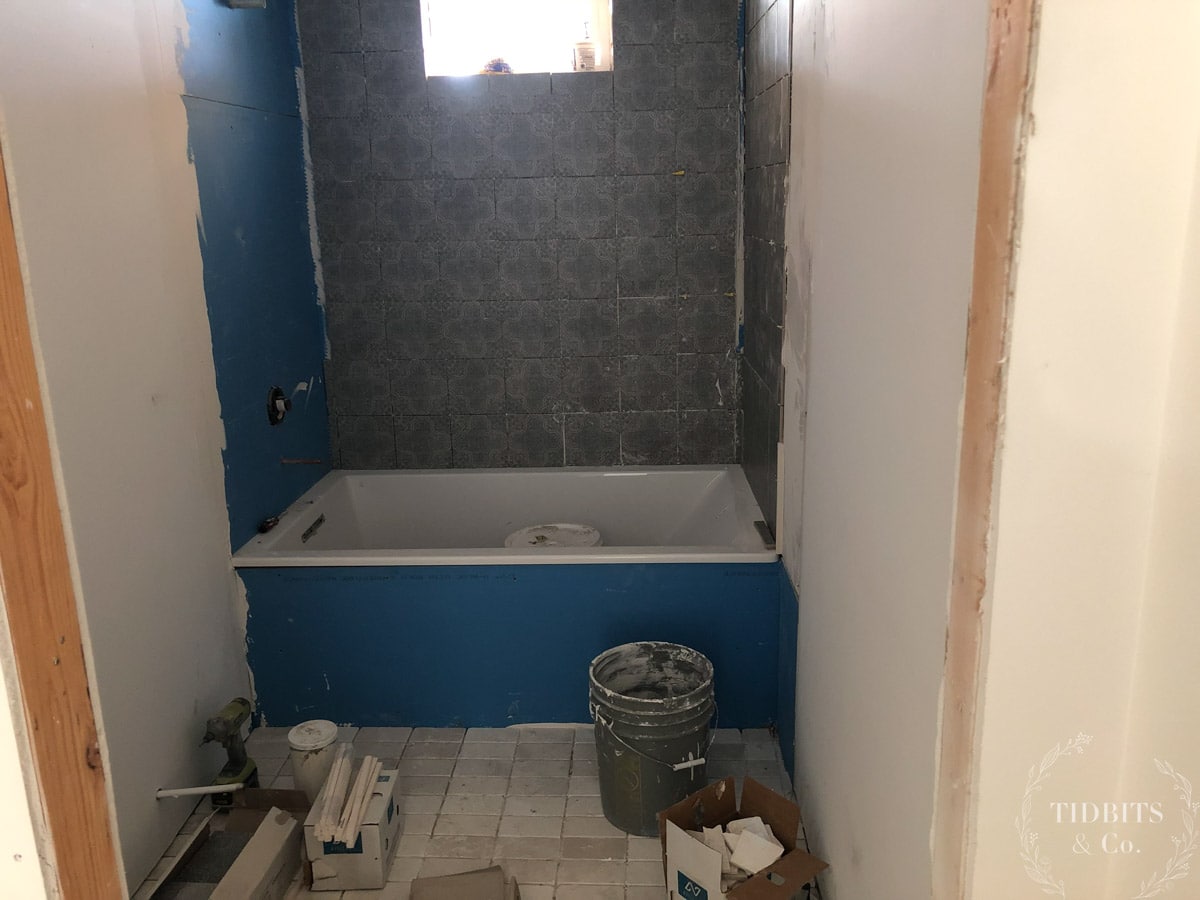
After the laundry room it was onto the split bathroom because we had to have a working toilet to move in.
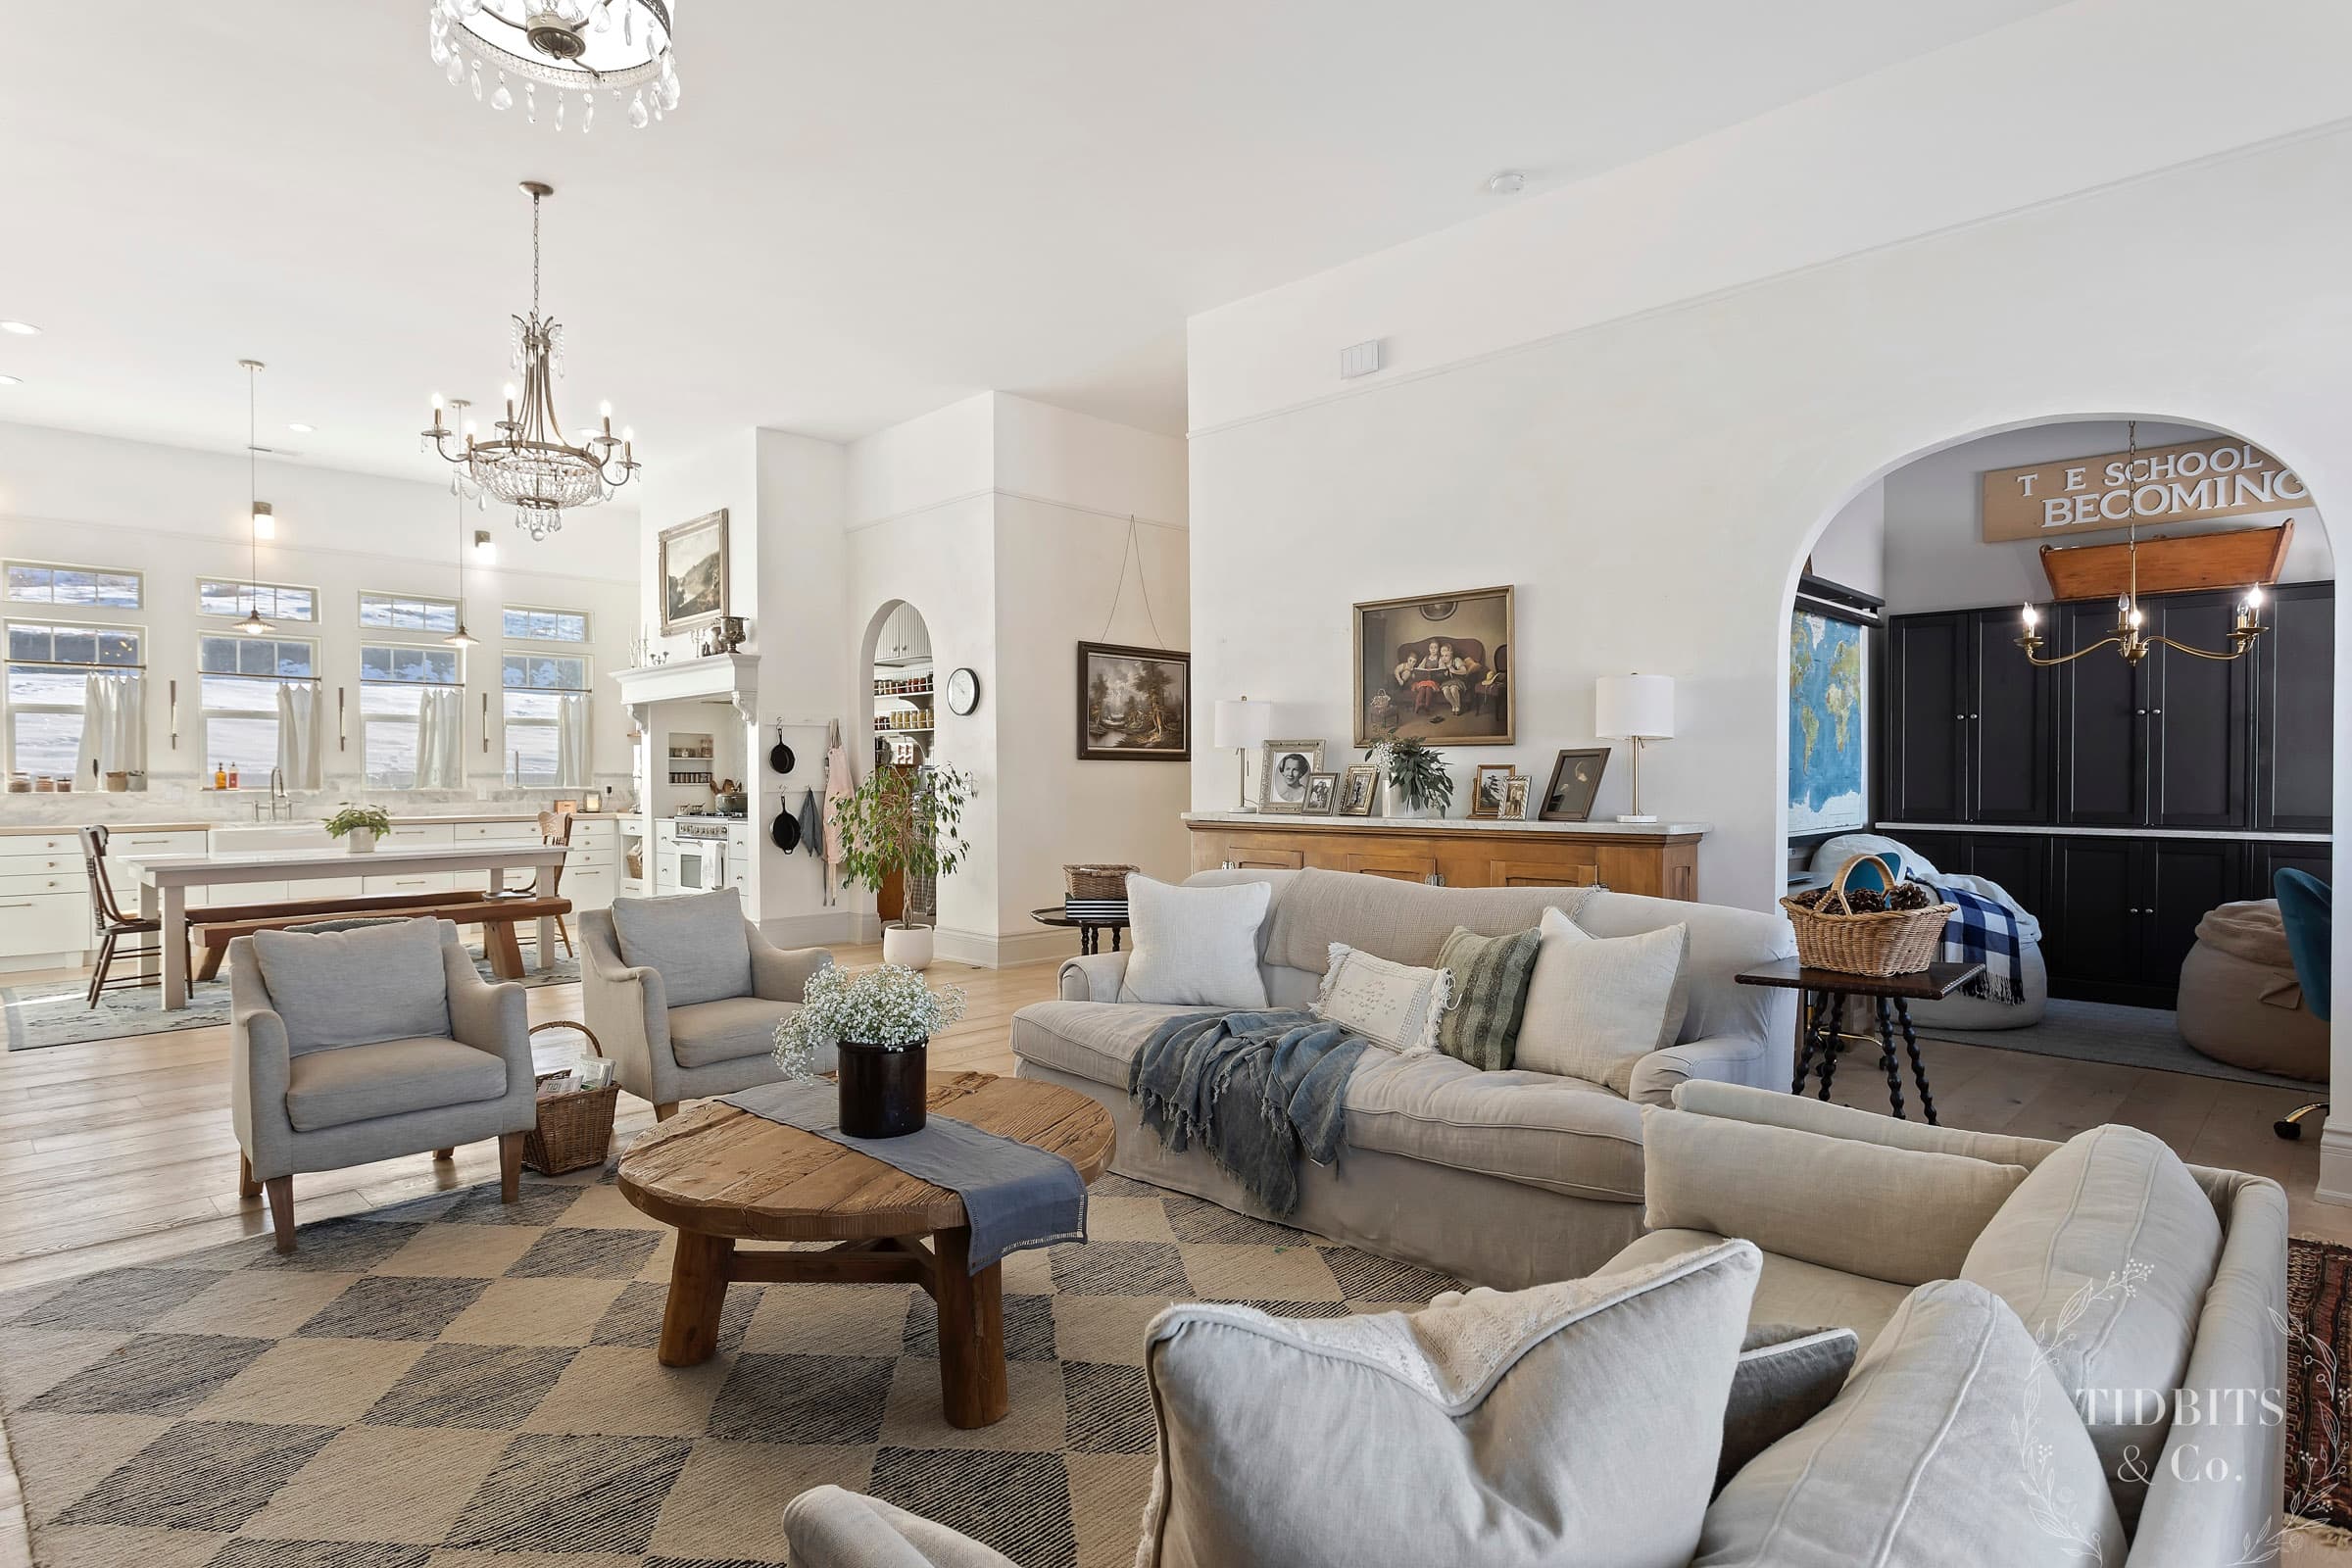
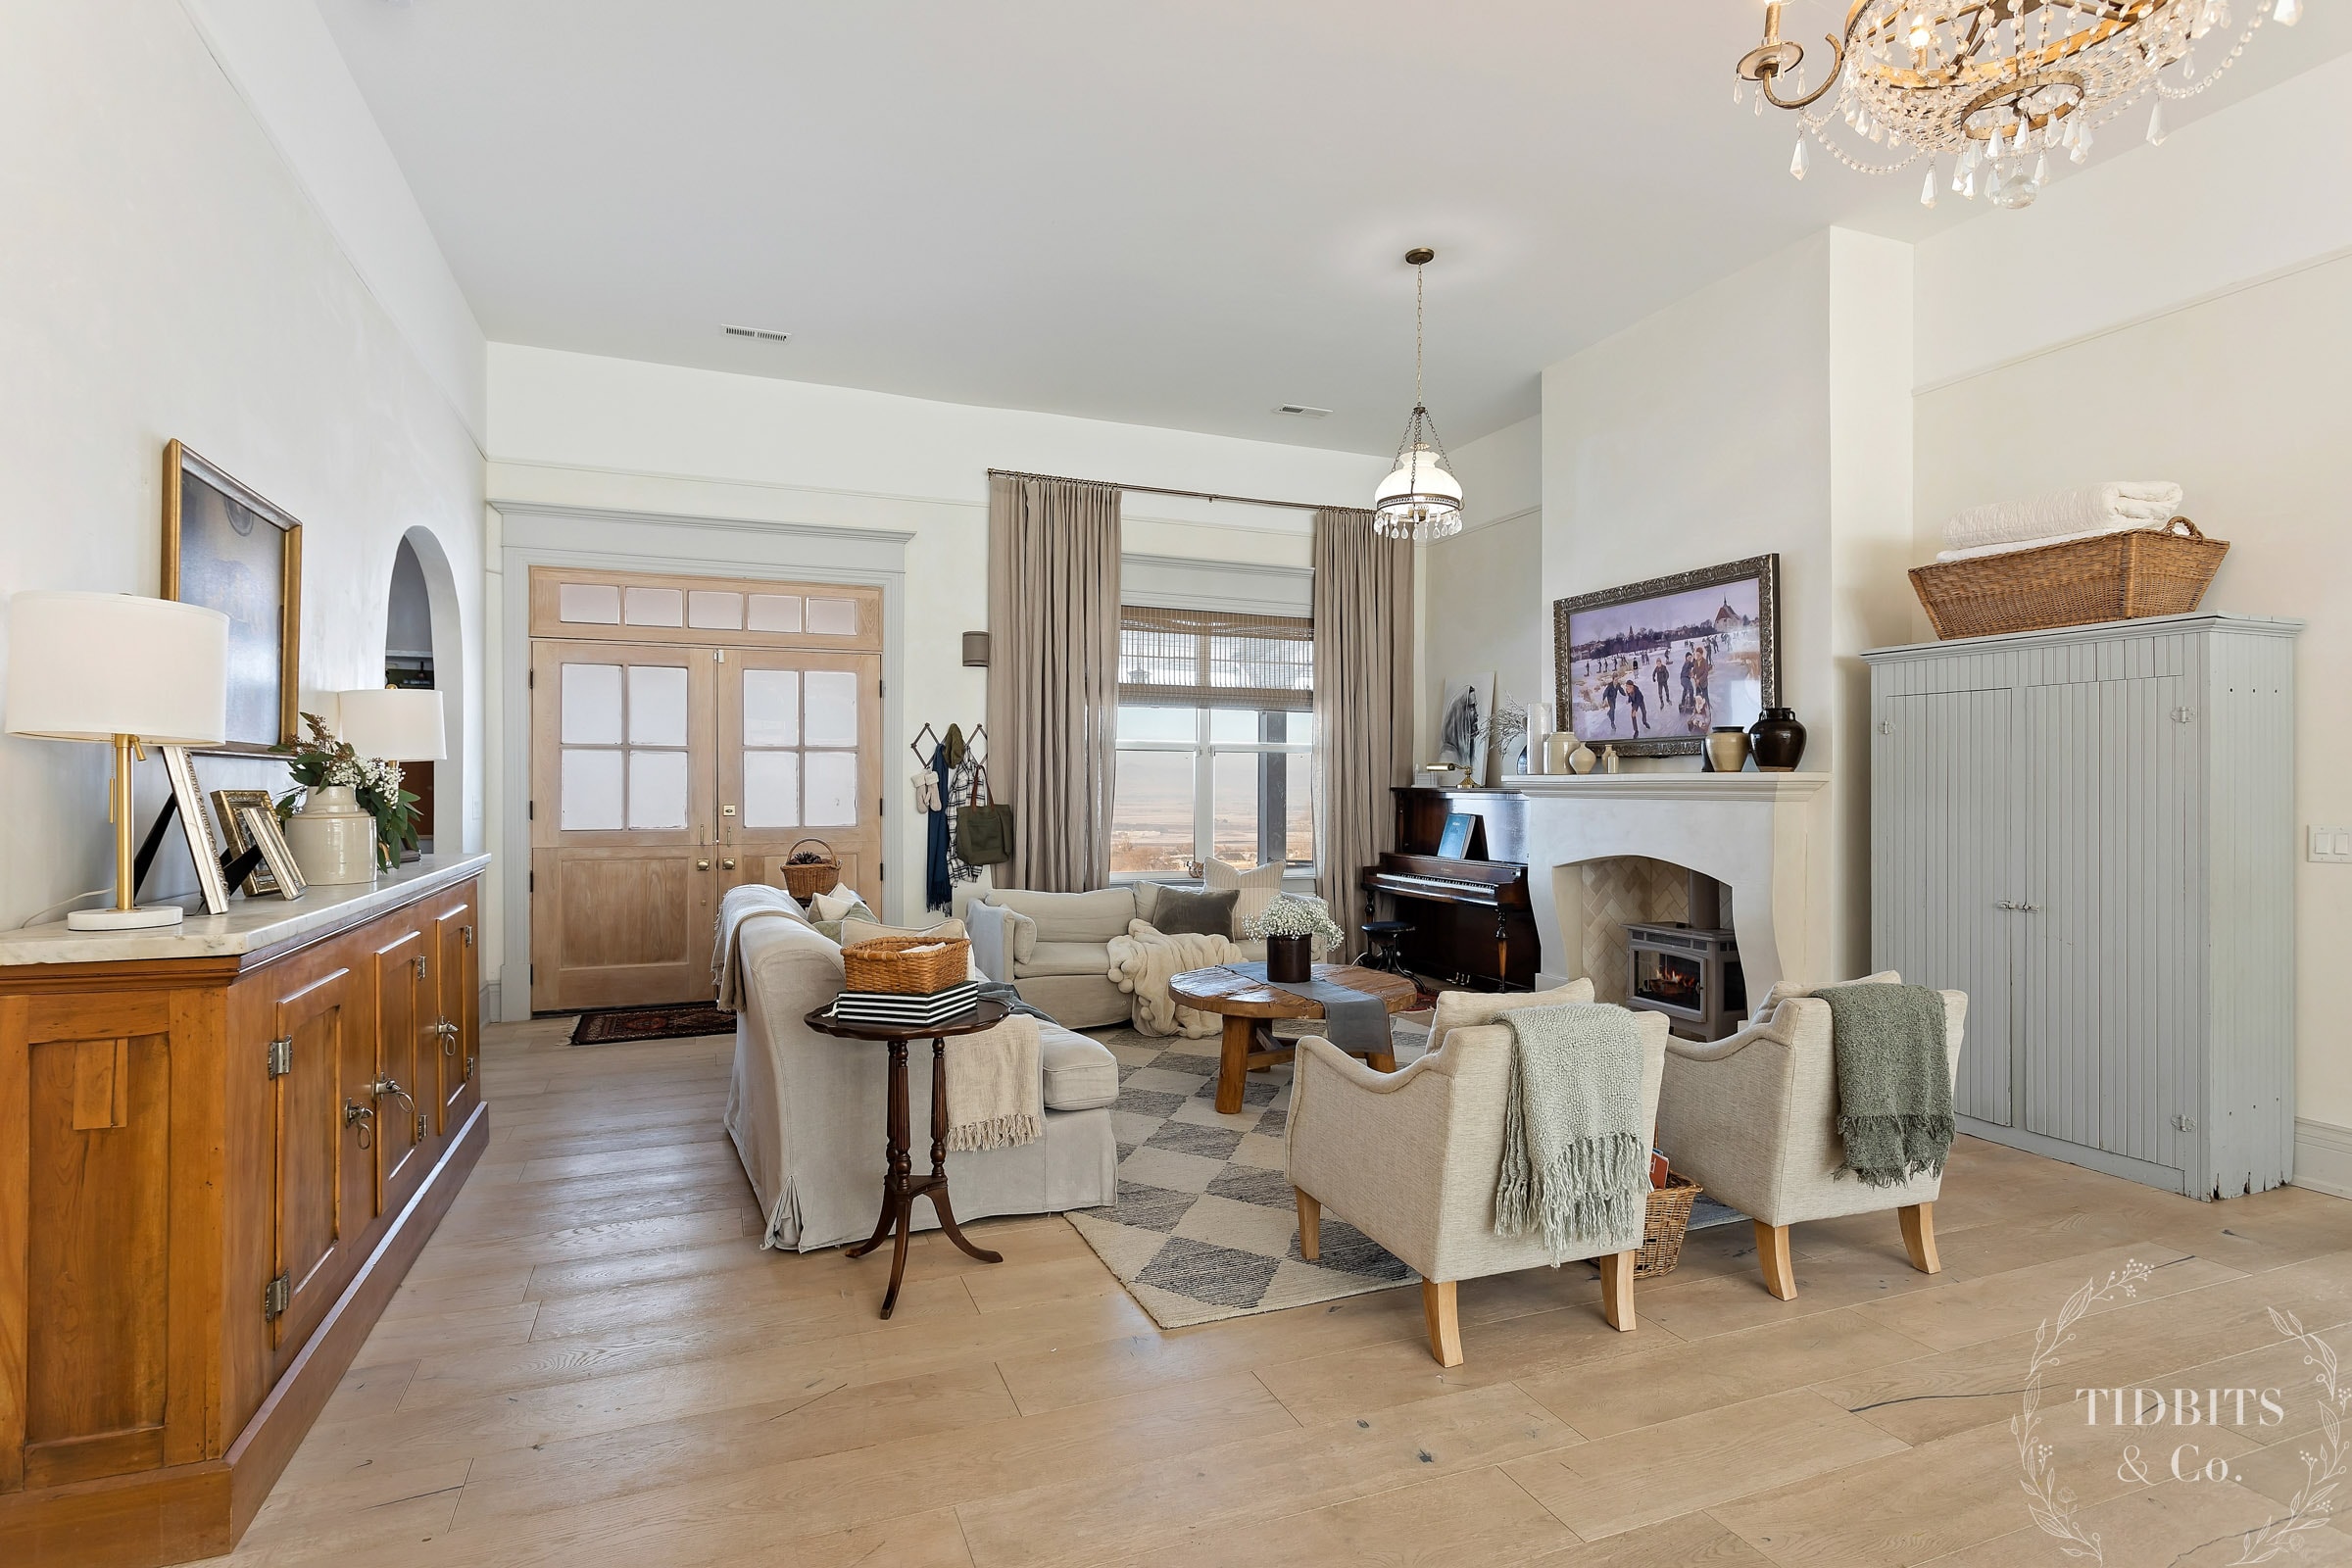
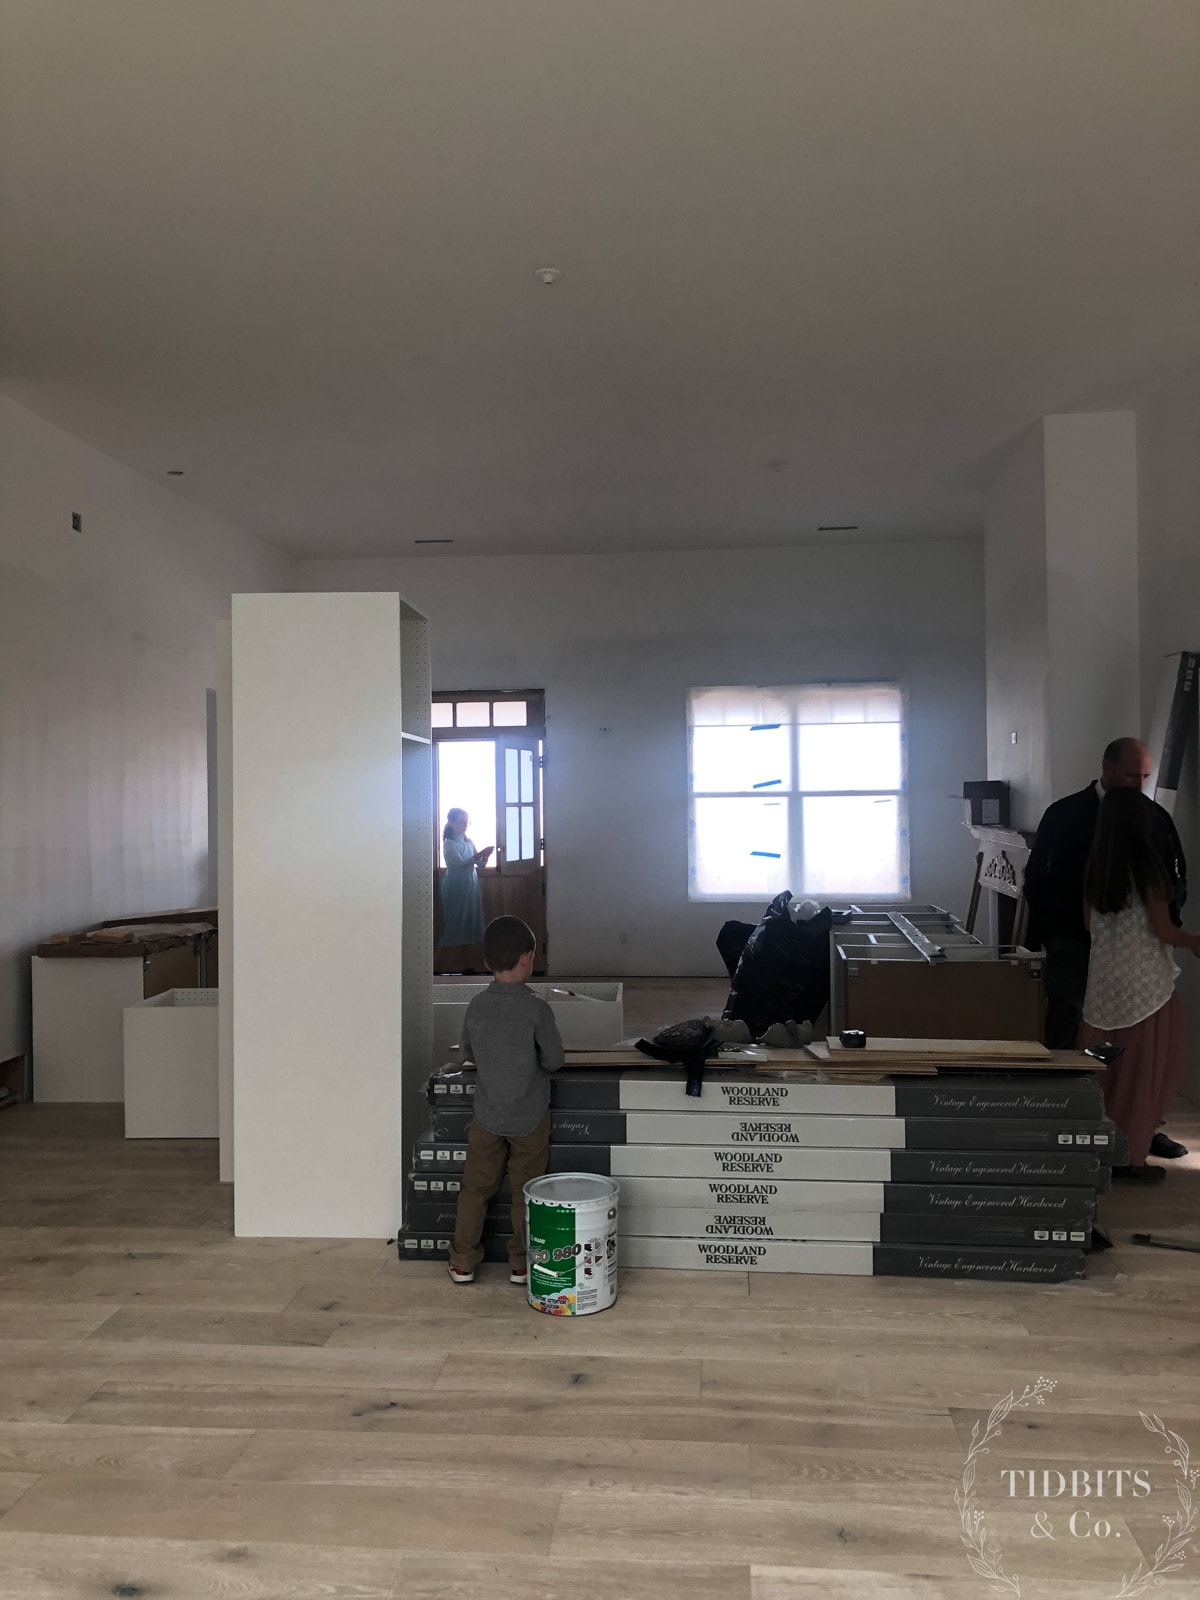
Painting, Flooring and Kitchen Progress
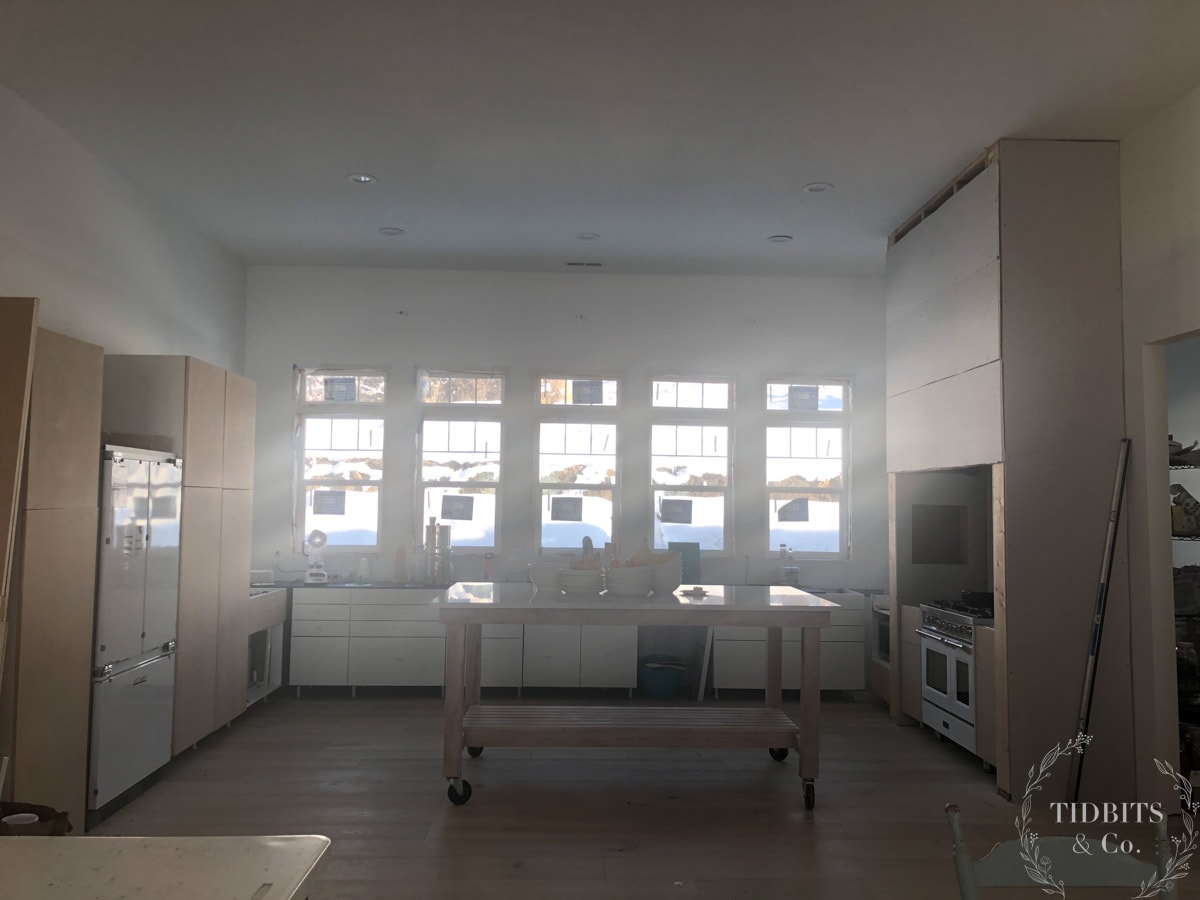
Painting the home came next, followed by flooring in the main living area. Bedroom flooring would come much later.
We also started to install appliances, cupboards and temporary countertops to tide us over until we could make our diy butcher block countertops.
Those temporary countertops ended up being plywood covered with contact paper. Make sure you look for a glimpse of those beauties in the YouTube video!
Moving in to Our Unfinished Pole Barn Home
At this point our family was exhausted from renting a house, moving into a camper and then bouncing around between air bnb’s while we built our home. We were desperate to move in whether our home was finished or not, and that’s what we did.
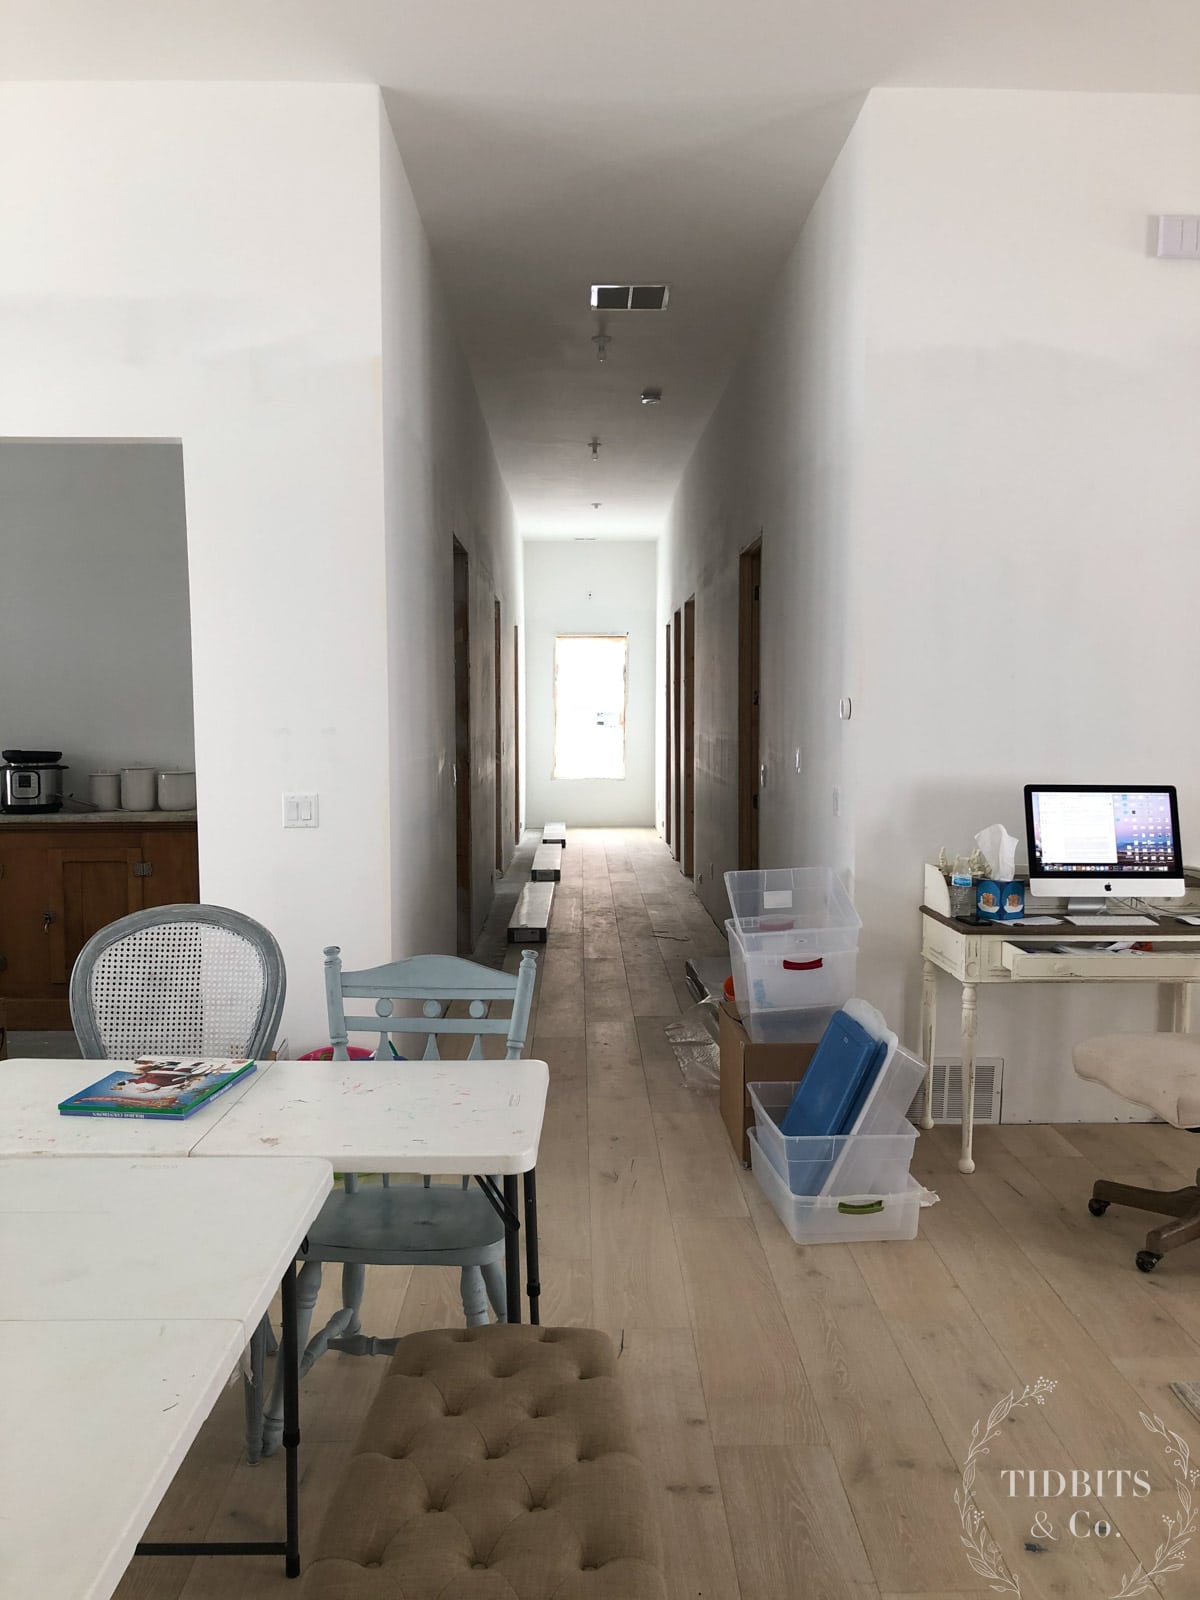
Once we were given the green light we moved into the middle of our construction zone and made due. We used what we had to get by and ran our home even with the chaos surrounding us.
4 More Years of Interior Finish Work
Although we were in our home at this point the work was far from over. We spent the next 4 years finishing one space at a time as circumstances allowed. In the meantime, we lived in various stages of an unfinished house.
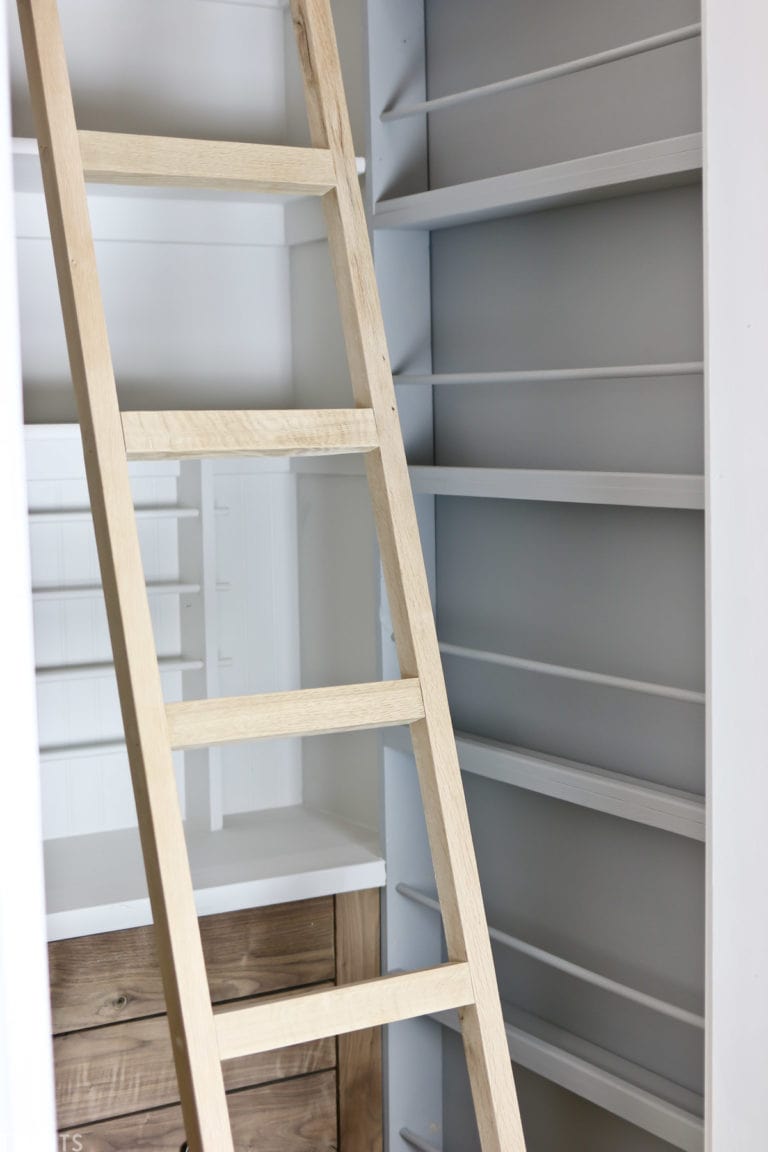
The very last interior space to be complete was the butler’s pantry. It was the cherry on top of this long construction process.
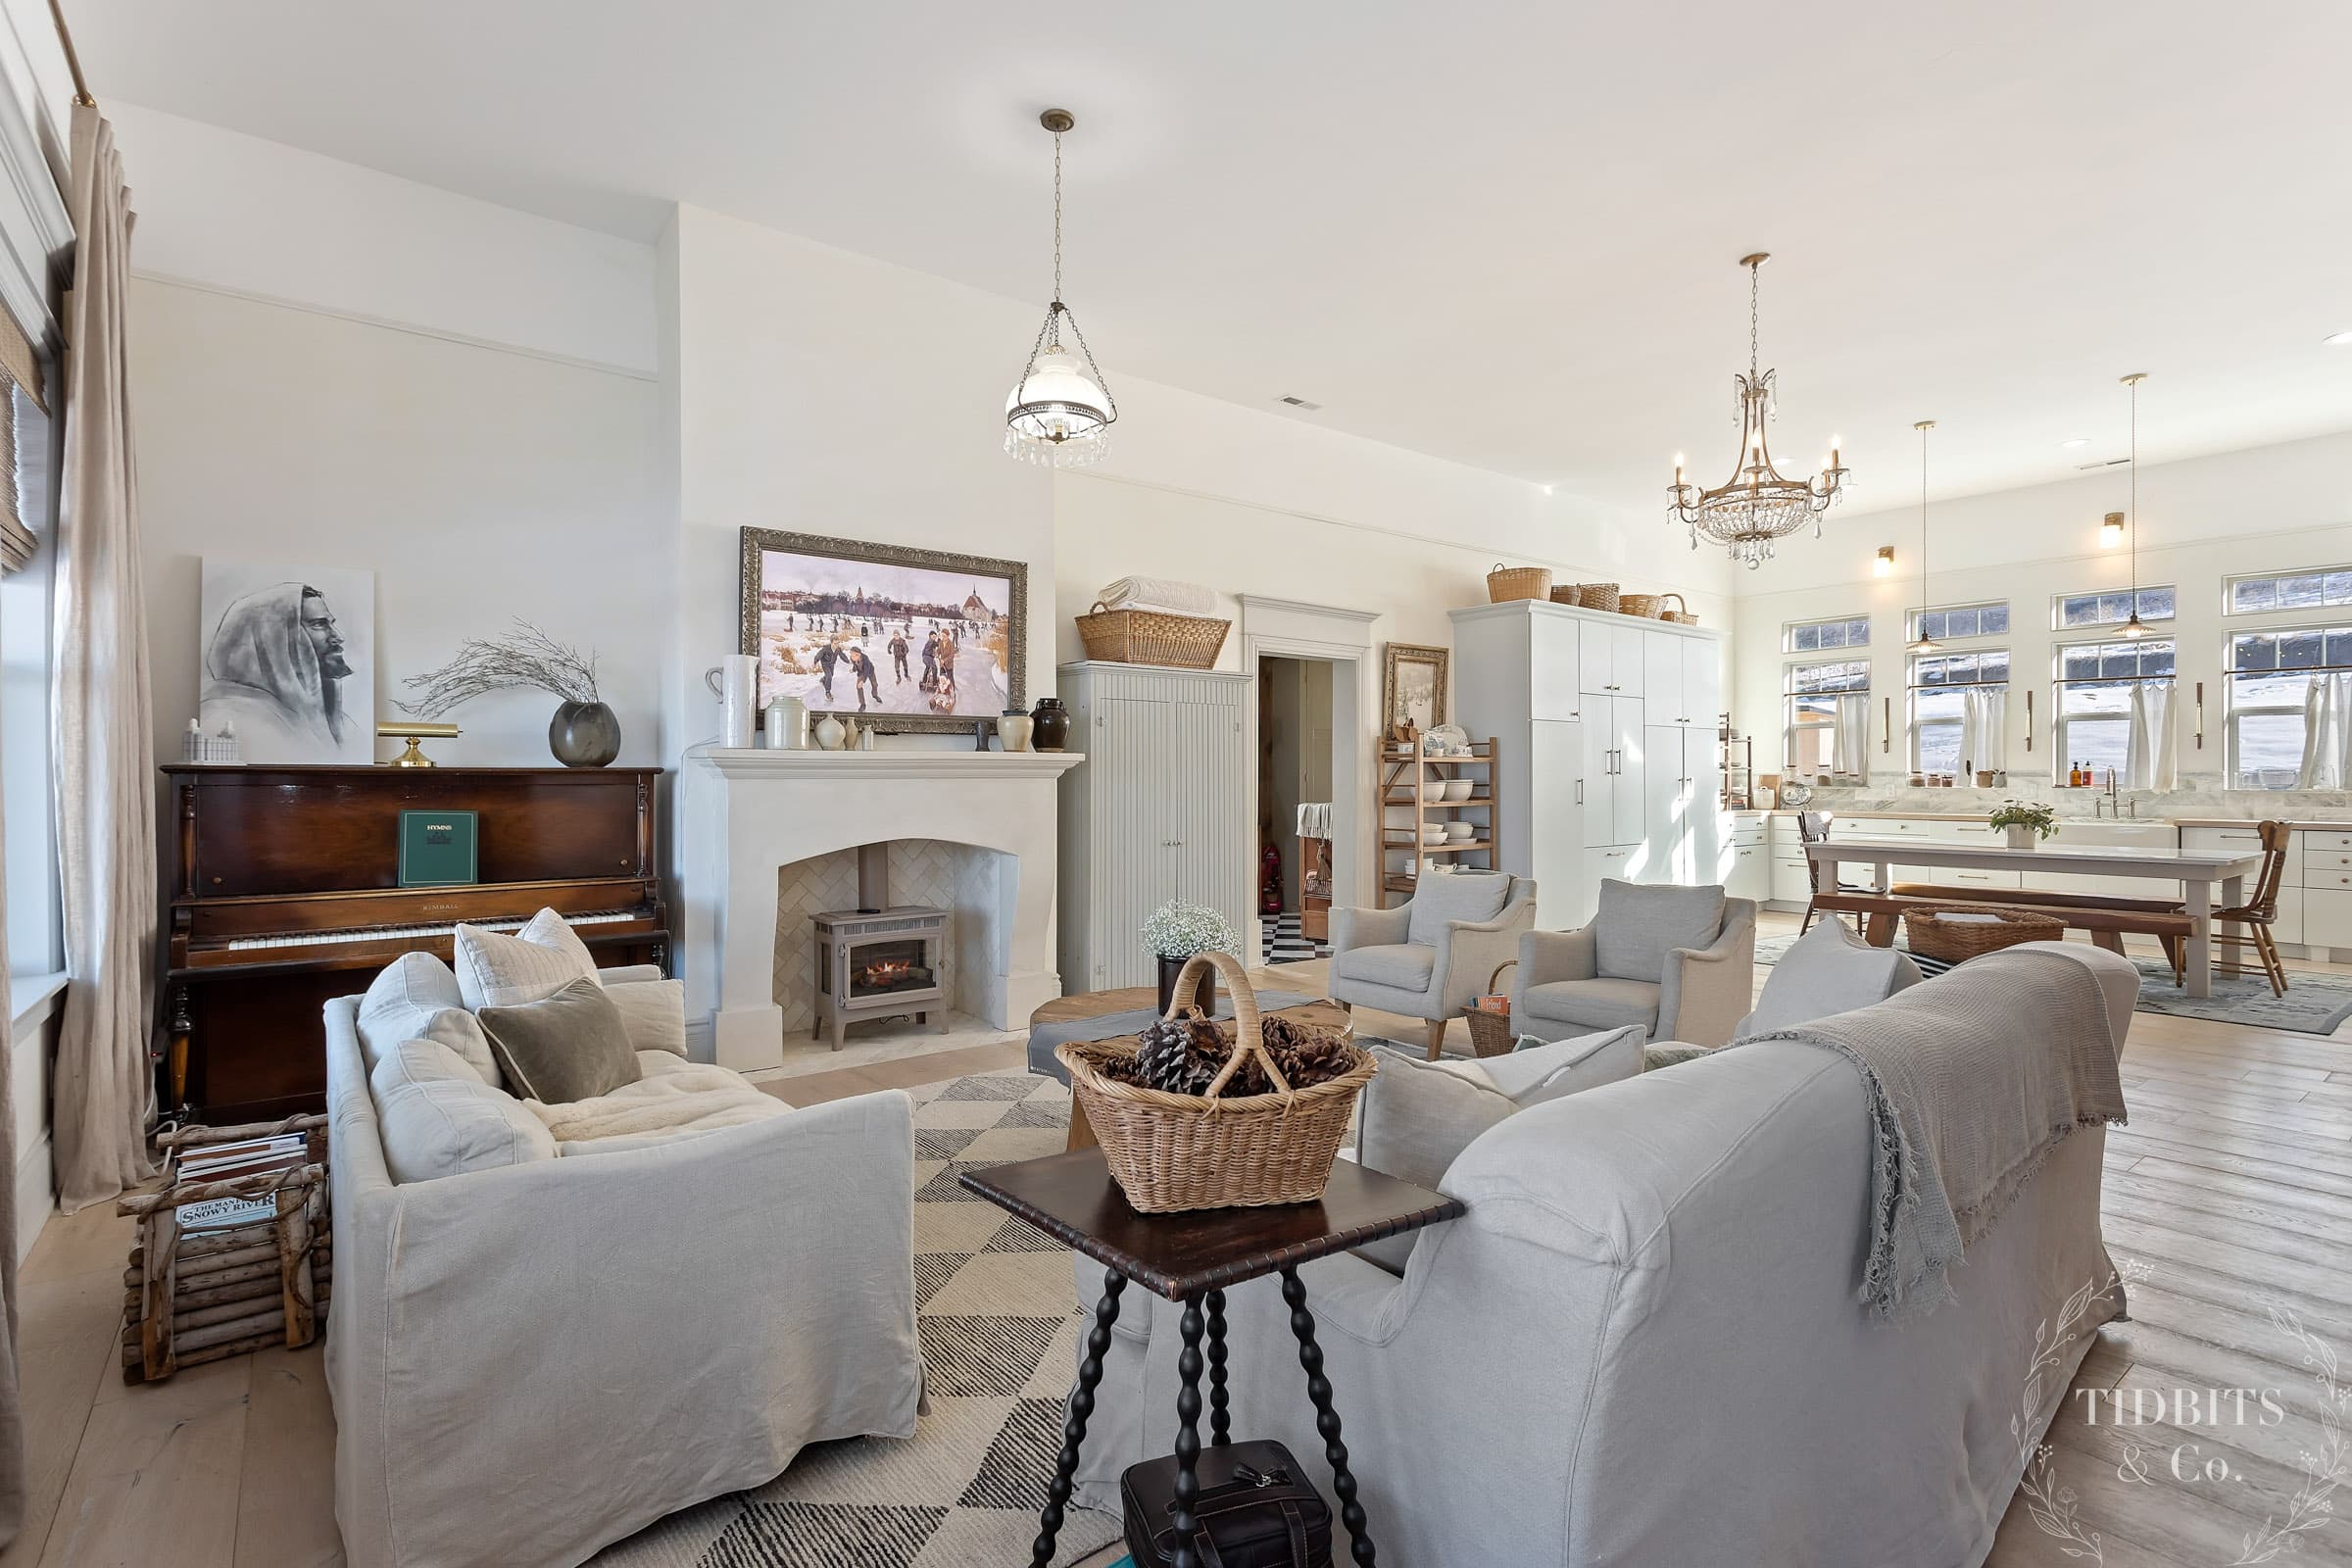
Today, we’re finally able to see the finished pole barn home that we planned years go. I can hardly believe how far we’ve come! It’s been a true labor of love and it has taught us so much. The pole barn home construction process wasn’t easy, but it was worth it!
Learn More About Our Pole Barn Home
And that’s our pole barn home construction process in a nutshell. Thanks for joining me to look back through that experience! I hope it will help you if you’re planning to build the home of your dreams or even if you’re just curious about building a pole barn home.
If you want to see more about this pole barn home, take a look at my many home tours or some of the following projects. Thanks for being here today!
- Design Ideas for Building a Pole Barn House
- Beautiful Front Porch Ideas for a Charming Home
- Small Bathroom Remodel Ideas – Learn from My Mistakes!
- Farmhouse Kitchen Ideas: Rustic Charm and Timeless Elegance
- Choosing and Installing our Custom Moulding and Trim
- DIY Building a Multi-Purpose Storage Closet
- Kitchen Design Regrets | What I wish I would have done differently
- Shared Kids Closet Design Reveal with Rolling Library Ladder
- Our Mudroom Progress with Checkerboard Honed Marble Tile Flooring
- 10 Charming Cottagecore Design Ideas
- European Farmhouse Living Room and FAQ
- My Living Room Design Regrets


Free Printables!
Get instant access to the TIDBITS subscriber library full of free printables for the keeper of the home.
Discover more TIDBITS
Love this article? Make sure to connect with me on your favorite social platform below, and leave a comment so we can chat!